Azure DevOps Pipelines - Container Releases Demystified
- The Build Stage
- Deployment Environments
- The Deployment Stages
- The Deployment Pipeline
- Looking Ahead
Over the past year, I’ve worked with teams using Azure DevOps pipelines to automate their Kubernetes deployments. We’ve had much success, but Azure DevOps is a rapidly changing tool. In this post, I’ll take another look at deploying to Kubernetes with Azure DevOps pipelines.
The Build Stage
The build stage creates artifacts for the deployment stage to use during deployment. Kubernetes is a container orchestration service, so our build pipeline needs to create a container image containing the application code. However, we need a second artifact because we use Helm to deploy applications to deploy to Kubernetes. To deploy to Kubernetes with Helm, we need a Helm chart package that describes the application deployment. The build stage for our pipeline needs to build both these artifacts. I am a big fan of Continuous Integration/Continuous Delivery. I’ve worked with several teams that were new to the concept. Teams accustomed to the “human touch” at every phase of build and deployment find CI/CD scary. A system that moves code changes directly to live environments feels out of control. No team is wrong to worry about ensuring release quality, and automated systems can help. To me, build and release pipelines are all about building trust in the artifacts as they travel from source code to production. The need to build trust means that before our pipeline produces a build artifact, it should take some steps to ensure the quality of each artifact it produces. For source code, this assurance usually takes the form of automated tests, static analysis, and vulnerability scanning. When building container images, vulnerability scanning should include not only our source code but the base images as well.
With these goals in mind, let’s start by building and testing our application!
Build and Push a .NET Docker Image
Our sample Dotnet application is called “parrot,” and it is one of a suite of applications called “phippyandfriends.” Each application in the suite uses a different implementation language, and we can deploy all to Kubernetes. But this post focuses on the Dotnet application, even though it does not do much interesting on its own.
I added a simple unit test so that we could see that the pipeline runs our test. And because in Dotnet core running test implicitly builds the application first, our starter pipeline includes only a test step.
In Azure DevOps, we implement our pipeline by writing an “azure-pipelines.yaml” file. Here is the complete pipeline YAML, to build and test the parrot application:
In an Azure DevOps pipeline, I usually start by overriding the build identifier using the “name” property. Next, we configure triggers to control when the pipeline executes. In the case of phippy and friends, there are multiple applications in the same repository, so the trigger restricts this pipeline to only trigger when parrot changes on the master branch. After the triggers, we can define the variables the pipeline shares across all stages. Then we can define the first stage, called “Build.”
The Build stage specifies one or more jobs to run. Jobs within a stage run in parallel unless otherwise specified. We’ll take advantage of that later. For now, there is only a single job, called “Docker” because it builds and pushes a Docker image to my Azure Container Registry (ACR). The Docker job specifies the virtual machine type it should run on, in this case, the latest available ubuntu agent hosted by Azure DevOps. Within the job are steps:
- Execute a shallow clone
- Load cached NuGet packages
- Specify the .Net Core SDK to use for the build
- Run the unit tests
- Publish the Application
- Build the Docker Image
- Scan the Docker Image
- Push the Docker Image to ACR
Execute a shallow clone
I’ve yet to encounter a build pipeline that requires the entire git history to execute correctly. This pipeline only needs the latest working copy to build the application. Pulling only the latest code can speed up build times on older repositories with longer histories. Including an explicit step to checkout allows for further customization if needed, including the opportunity to clean out the working directory before checkout.
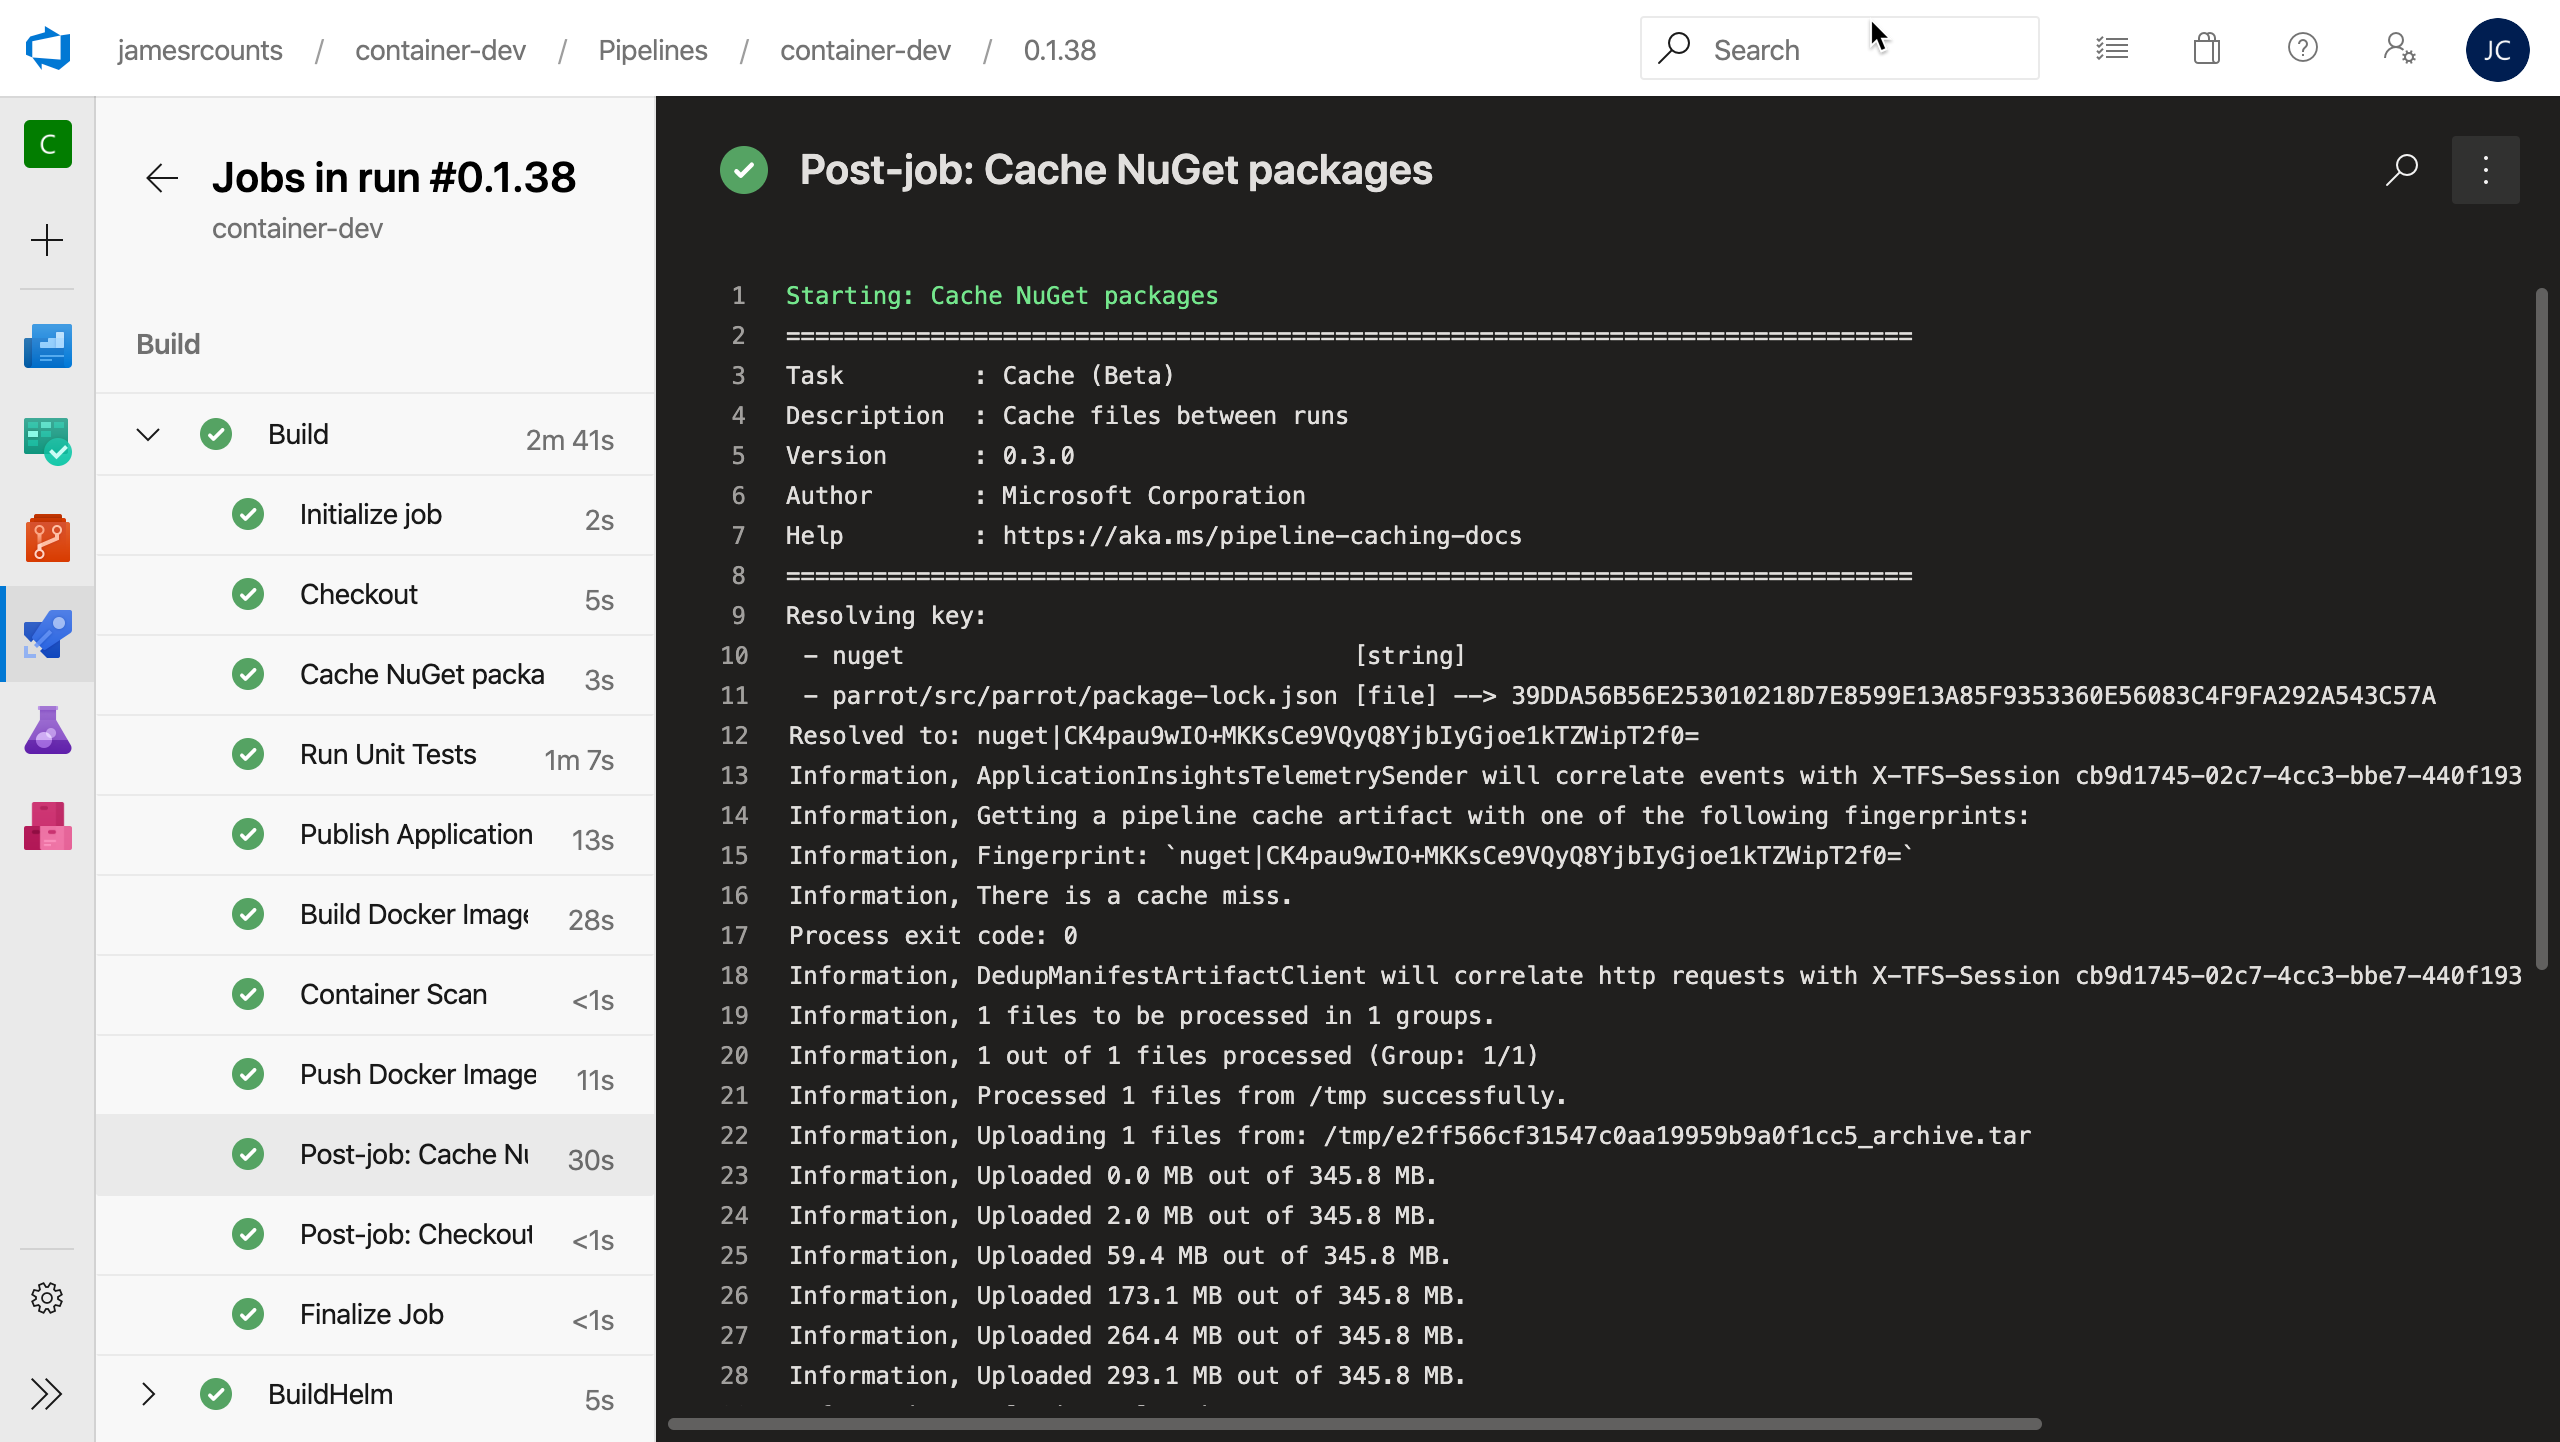
Load cached NuGet packages
Azure Pipelines can cache just about any file added during the build process, including NuGet packages, npm caches, Maven downloads, and more. While pipeline caching is still in preview, saving cached files can reduce build time by saving these dependencies in between runs.
The cache is simple to set up, you specify a key, which can include both simple strings and file paths. When using a file path as part of the key, the contents are hashed to a signature first. In the case of this NuGet caching step, changes to “package-lock.json” automatically invalidate the cache. If Azure Pipelines finds no matching cache item, the task automatically schedules an upload at the end of the pipeline. On a cache miss, Dotnet downloads the NuGet packages as it usually does, then uploads them to the cache once the build succeeds. No upload takes place if the build fails.
Specify the .Net Core SDK to use for the build
To create repeatable pipelines, we should control all inputs to the pipeline, not just our code. So, we specify the dotnet core SDK version for Azure Pipelines to use. This way, when Microsoft updates the default dotnet version on their hosted agents, our pipeline continues to use a version appropriate for the parrot application. More importantly, the version the parrot binaries expect and the version on the Docker base image match.
Run the unit tests
The next step runs the unit tests in release configuration. This step implicitly builds the application, then runs the unit tests in the unit test project. If the cache failed to restore the NuGet packages, dotnet restore downloads them as part of this process.
Writing and running unit tests is meant to increase the level of trust in the system you are building. If the unit tests fail, the build pipeline stops, and later steps won’t execute. This behavior makes it hard to miss the overall test/pass status. But it’s also nice to view the test results without digging through logs. Luckily the Azure DevOps Dotnet CLI task automatically uploads build results from the build agent so that we can see the results right in the browser.
There are many other free or commercial tools that you can integrate with Azure Pipelines to provide additional reports like code coverage or static analysis. You can look for your favorite tools in the Visual Studio Marketplace under Azure DevOps.
Publish the Application
Next, add a step to publish the Dotnet code. Despite its name, publishing does not deploy the code anywhere. Instead, publishing gets all the files ready to be incorporated into the Docker image in later steps.
The publishing step should run very fast because the test step already built the code for us. Reusing the code that the pipeline already built not only saves time but aligns our pipeline with a continuous integration principal. The pipeline should only build the code once. Our pipeline generates an audit trail that demonstrates our code has qualities we want. The pipeline shows that these binaries pass our unit tests. The pipeline shows we achieved a certain level of code coverage. The pipeline shows we found no known vulnerabilities in our dependencies. The pipeline shows these qualities and any others we choose to add. At no point do we want to rebuild the binaries and introduce a reason to doubt whether the new binaries are the same as the ones we tested already.
This publishing step invokes the dotnet CLI with the “publish” command and provides the path to the application project file. In the arguments property for the task, we provide two arguments. First, the configuration flag indicates we want to publish a release build. Next, the output flag indicates the directory to move the binaries to. As mentioned, the dotnet CLI does not rebuild this project once it establishes that the binaries are already present. Moving the pre-built binaries is valuable to us because it gives us a simple location to pull those files from when creating the Docker image.
After publishing the binaries to the “dist” directory, we are ready to add steps to build and push a Docker image.
Build the Docker Image
The latest Docker task offered by Azure Pipelines can build a Docker image and push it directly to ACR in one step. This pipeline uses the current Docker task but does not take advantage of the combined build and push command. Instead, this step only builds the docker image. Building the docker image as a separate step allows later steps to scan the Docker image for vulnerabilities, just like we can test and scan the dotnet code.
To set up the Docker image build, we supply a service connection to our ACR (called ‘ACR’ here). Providing the ACR service connection allows the task to infer the login server portion of the image repository name. In this case, “parrot” is the container repository name. Finally, we tell the task where to find the Dockerfile and build context. Again, because multiple applications exist in the phippy and friends repository, we need to be more specific than the task defaults allow. Finally, we specify the build number as a tag for the image. If we want to specify more than one tag, we can specify one per line.
Because the test step already produced binaries and validated them with our unit tests and other scans, our Dockerfile does not repeat these steps. Instead, we select an appropriate base image and patch all of its packages to remove any known vulnerabilities. To add our application to the image, the Dockerfile only needs to copy the binaries from the publishing location into the appropriate directory on the image.
Scan the Docker Image
In this example, this step is only a placeholder. Setting up container scanning in the build pipeline involves some complexity. However, for security-minded teams checking containers for vulnerability and compliance is a necessity. These types of scans further increase our trust and confidence in the image we just built, so that we know it is appropriate for deployment.
This scanning step belongs in the pipeline after the image is available locally, but before the step to push to ACR.
Push the Docker Image to ACR
Finally, the pipeline pushes the Docker image to ACR. Again the pipeline uses the Docker task for this step. The ACR service connection provides authentication to the ACR, and the repository and tags properties indicate which images to push from the local cache into the remote registry.
Build and Push a Helm Chart
Parrot includes a Helm chart definition to facilitate deployment to Kubernetes. Our deployment pipeline benefits from Helm because Helm provides a template engine for customizing our Kubernetes configurations per environment. Helm is the defacto standard for customizing Kubernetes configurations. Other tools may overtake it in the future, but Helm maintains market dominance for now.
Using a Helm chart means the pipeline build stage needs a second job, to produce a second artifact: the helm chart package. Because the package helm chart has no dependencies on the application code or the Docker image, the pipeline can build it in a separate job in the same build stage. When a stage has multiple jobs, each job executes in parallel by default, and we can save a little time by building both artifacts at once.
Here is the complete helm job to add the build stage in “azure-pipelines.yaml” file:
The new job, called “Helm” because it builds and pushes a Helm chart to ACR. Like the Docker job, the Helm job specifies the virtual machine type it should run on, in this case, the latest available ubuntu agent hosted by Azure DevOps. Within the job are steps:
- Checkout
- Initialize Helm
- Package Helm Chart
- Push Helm Chart
Checkout
Just like the dotnet and Docker build steps, the helm chart does not need the full git history to build the chart. So, we execute a shallow clone in the Helm job to retrieve only the latest working copy.
Initialize Helm
The pipeline uses the Helm installer task to pin a specific version of Helm to use when building our chart. We pin the Helm version for the same reasons we pinned the dotnet version earlier–to control as many inputs into our build process as possible.
Package Helm Chart
After getting our code and tooling in place, the next step in the pipeline uses a Helm deploy task to package the Helm chart. The Helm deployment task needs to know where the chart source is, and what version to assign the chart, to package the Helm chart. The final property “save” is set to false because we do not need to install the chart on the local build agent.
Push Helm Chart
Unlike the Docker task, the HelmDeploy task includes no push command to move the local package into ACR. The pipeline finishes with an Azure CLI task to push the chart into the registry. The Azure CLI task requires configuration to provide a service connection to an Azure subscription. This service connection should connect to a subscription containing an ACR instance.
Once we provide an appropriate connection, we also provide the Azure CLI task with a script to execute. In this case, our script uses the Azure CLI’s “acr helm push” command to store the Helm package in our registry. When the Azure CLI task executes, it logs in to Azure with the provided service connection, executes our script, then logs out automatically.

Deployment Environments
So far, this post assumed we had created an Azure Container Registry in an Azure subscription. Now that we have placed our build artifacts into the ACR, we need to think about where we want to deploy them. Our example environment includes two Kubernetes environments, both hosted by Azure Kubernetes Service (AKS). This section shows how to configure Azure DevOps with information about these environments before we set up our Azure pipeline to perform deployments.
Azure DevOps environments allow us to track deployments to each of our clusters. The development requirement allows continuous delivery–code is released to development as soon as builds complete. The production environment requires manual approval before releasing code. The manual approval check allows developers to perform further tests and validations before putting new code in front of customers.
Our pipeline definition does not include Environments configuration. Although the YAML targets an environment, the pipeline is a separate object in Azure DevOps. This separation allows teams to manage governance requirements, like the manual approval check for the production environment, outside source control. Permission to write and configure pipelines can be kept separate from permission to deploy to environments.
To create each environment, login to Azure DevOps and choose “Environments” under pipelines, then choose “Create Environment”:

Next, type the environment name “dev” and choose “Kubernetes” as the resource.
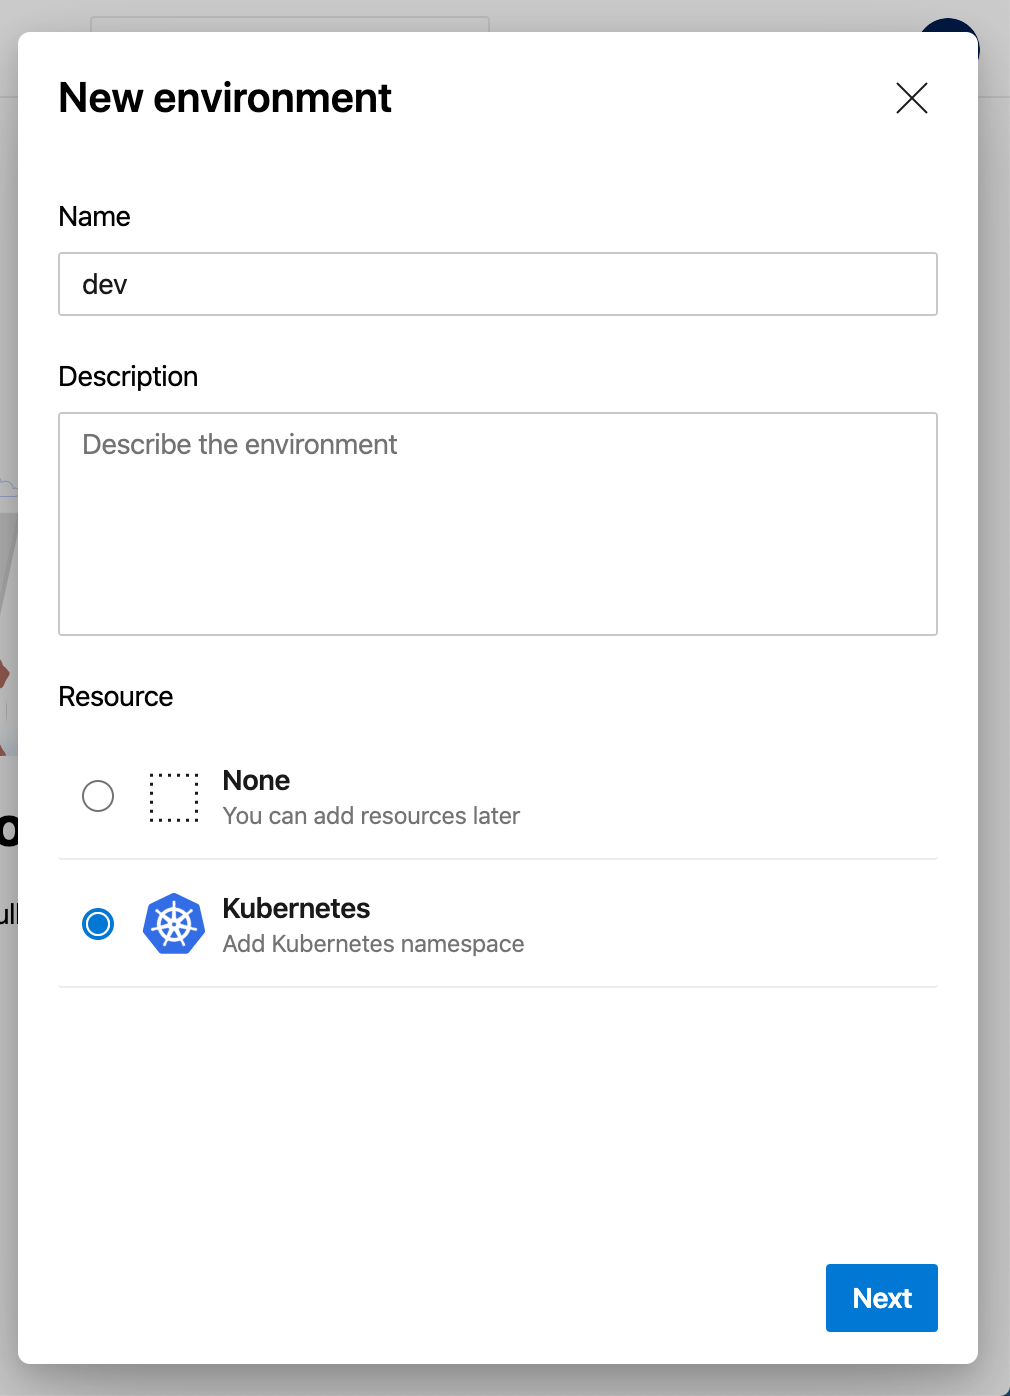
Choose “Next,” then wait a moment for Azure DevOps to prompt you for your Azure credentials. Enter your authentication information. Choose “Azure Kubernetes Service” as the provider, then choose your subscription from the “Azure subscription” dropdown. Pick the development AKS cluster from the “Cluster” dropdown. As the final step, choose or create a namespace in which to deploy applications. In this case, the namespace is “apps.”

Choose “Validate and create.” On success, Azure DevOps displays the newly created environment.
Next, follow a similar set of steps to create a production environment. To configure the manual approval, use the vertical ellipsis menu to access the “Approvals and checks” menu item.
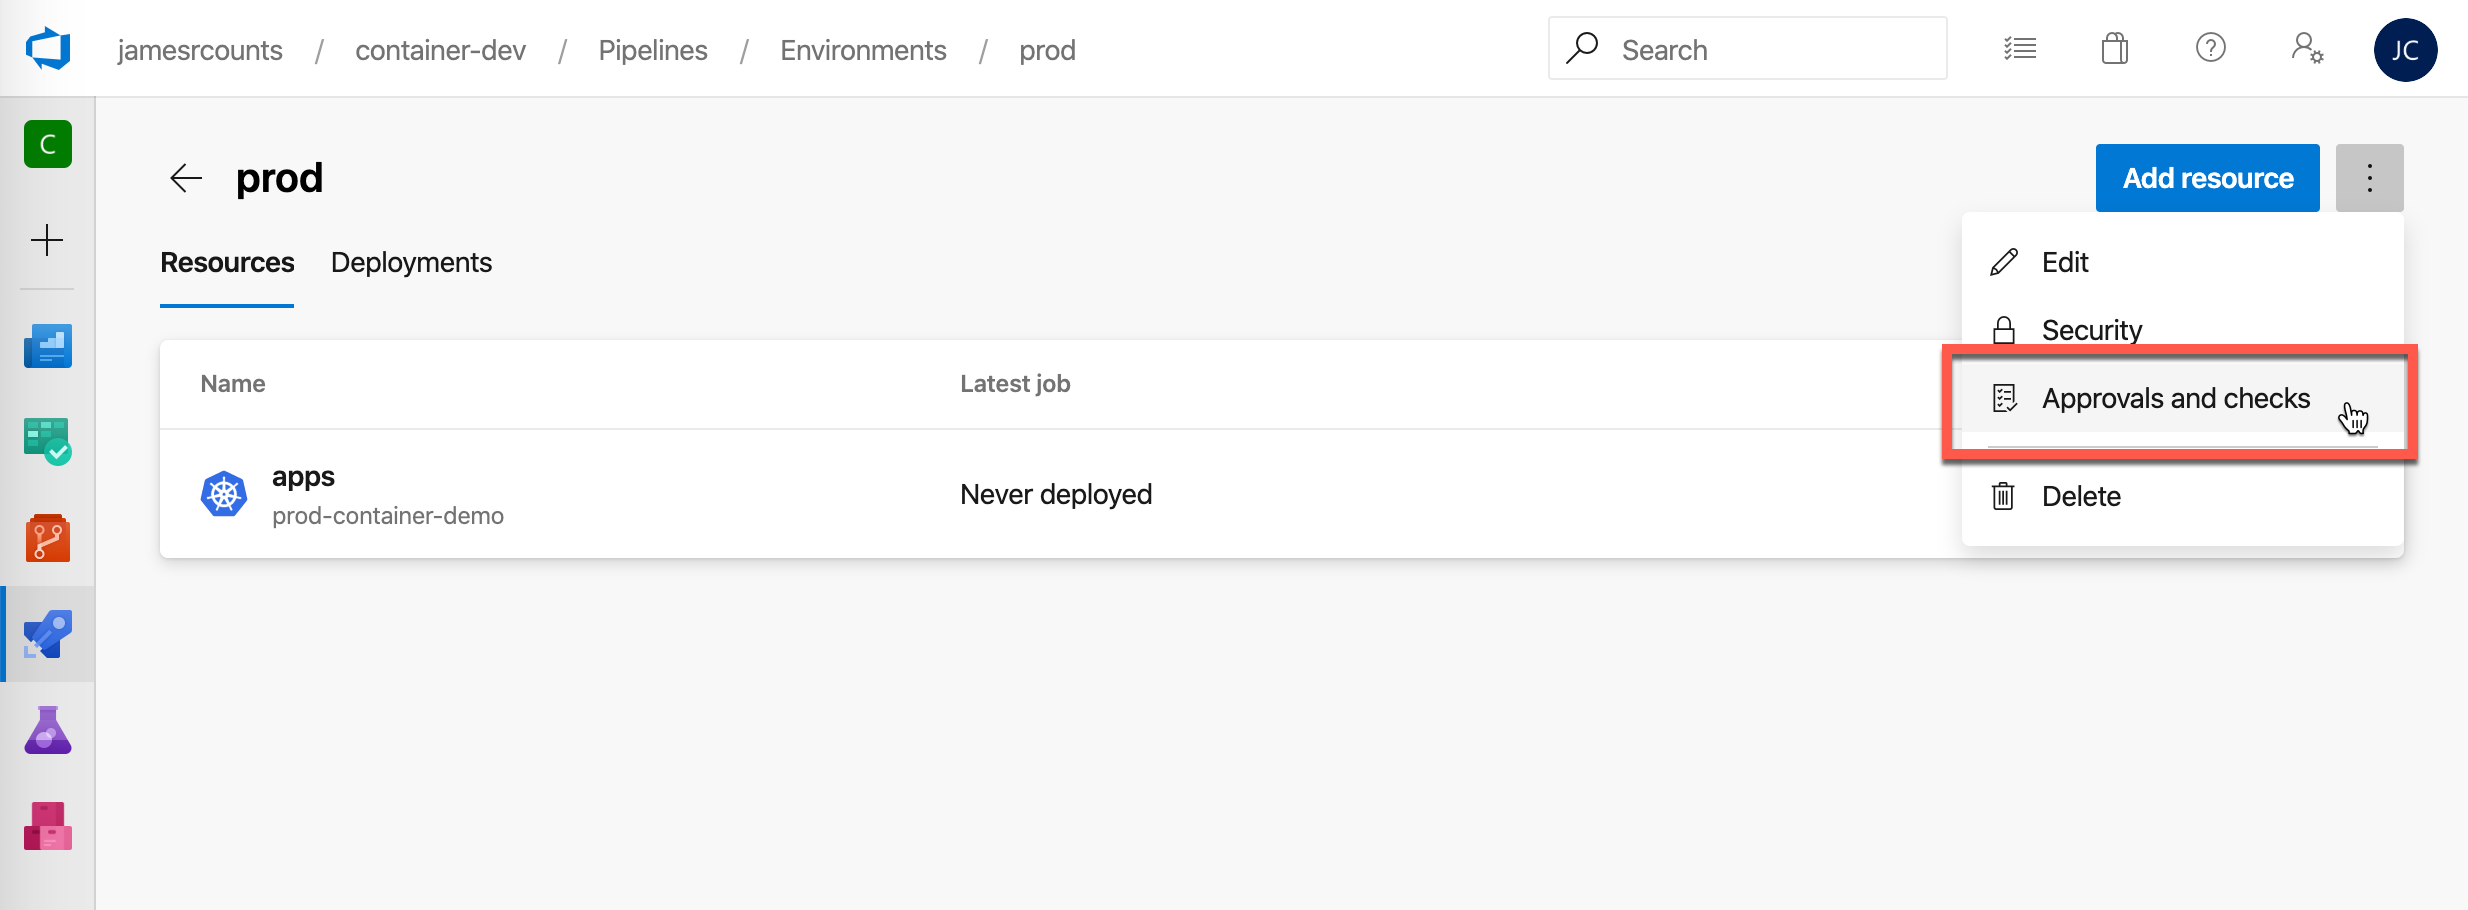
Choose “Approvals” to create manual approval check.

Add an appropriate approver and instructions. I added myself as an approver. Then choose “Create.”

On success, Azure DevOps displays the configured Approval.

These Azure DevOps environments are now configured to use with deployment stages in our container pipeline. The next section covers how to setup deployment stages to target these environments.
The Deployment Stages
With environments now configured, here is the final pipeline YAML with both deployment stages in place:
Like build stages, a deployment stage specifies one or more jobs. Each job specifies the agent VM type to use and an environment to target. When a job targets and environment, Azure DevOps evaluates all deployment checks configured on the environment before executing the job. The development environment requires no deployment checks. However, in the case of the production environment, we configured a manual approval check–production deployments require manual approval before running.
Before specifying the deployment steps, we declare which deployment strategy to use: run once or canary. This pipeline uses the straightforward run once strategy for both environments.
Each deployment stage includes similar steps. This section examines the deployment of the development environment. The production environment deployment and the development environment deployment are identical other than a few variables indicating where to deploy.
These are the development environment steps:
- Disable Checkout
- Install Helm
- Initialize Helm
- Add ACR to Helm Repository List
- Deploy Helm Chart
Disable Checkout
The deployment stages only interact with the ACR and the AKS clusters. They build stages only needed the latest working copy to build the Docker image and the Helm chart. Those stages used shallow clones to avoid downloading unnecessary history. The deployment stages don’t need any history at all. So we disable the default checkout behavior to prevent Azure DevOps from downloading any code at all.
Install Helm
Like the Helm build job, the deployment job pins a specific version of Helm to the build agent. At the time of this writing, it is especially important to choose your Helm version, as Helm 3 recently released and requires a migration step before use in an existing cluster.
Initialize Helm
To install a Helm chart from ACR, we need to add the ACR to the build agent’s repository list. Before doing that, we need to initialize Helm locally, and the previous Helm install step did that. Initializing the server-side tiller component with the same version as the Helm client ensures the best possible compatibility. This task assures both are in sync.
Add ACR to Helm Repository List
An Azure CLI task executes Azure log in, then adds the ACR instance to the local helm repository list.
Deploy Helm Chart
Now the build agent is configured to deploy our Helm package. We only need to deploy the Helm package. Our AKS cluster pulls the appropriate container image from ACR when it processes the Helm chart.
To configure the Helm deployment task, provide the service connection to use, the AKS cluster’s resource group, the name of the AKS cluster, and the name of the namespace in which to deploy the application. That feels like many details to configure, but think of it as an address. The mail carrier needs to know more than the country the recipient is in to deliver a letter, but also the city, zip code, and street.
After configuring the Kubernetes details, configure the task with details about the chart to deploy and any environment-specific overrides. These include the name of the chart to deploy, what release name to track this deployment by, and the specific tagged docker image to pull for ACR.
The Deployment Pipeline
Once we put everything together and deploy to Azure DevOps, we can see an end-to-end view of our deployment pipeline:

On one screen, we can see that the pipeline created both the Docker image and Helm chart artifacts successfully. All configured tests passed, and the new version of the parrot application is already running in the development environment. As for the production environment, Azure DevOps shows us that approval is needed before it runs this stage.
When we choose “Review,” Azure DevOps shows us the approval view.
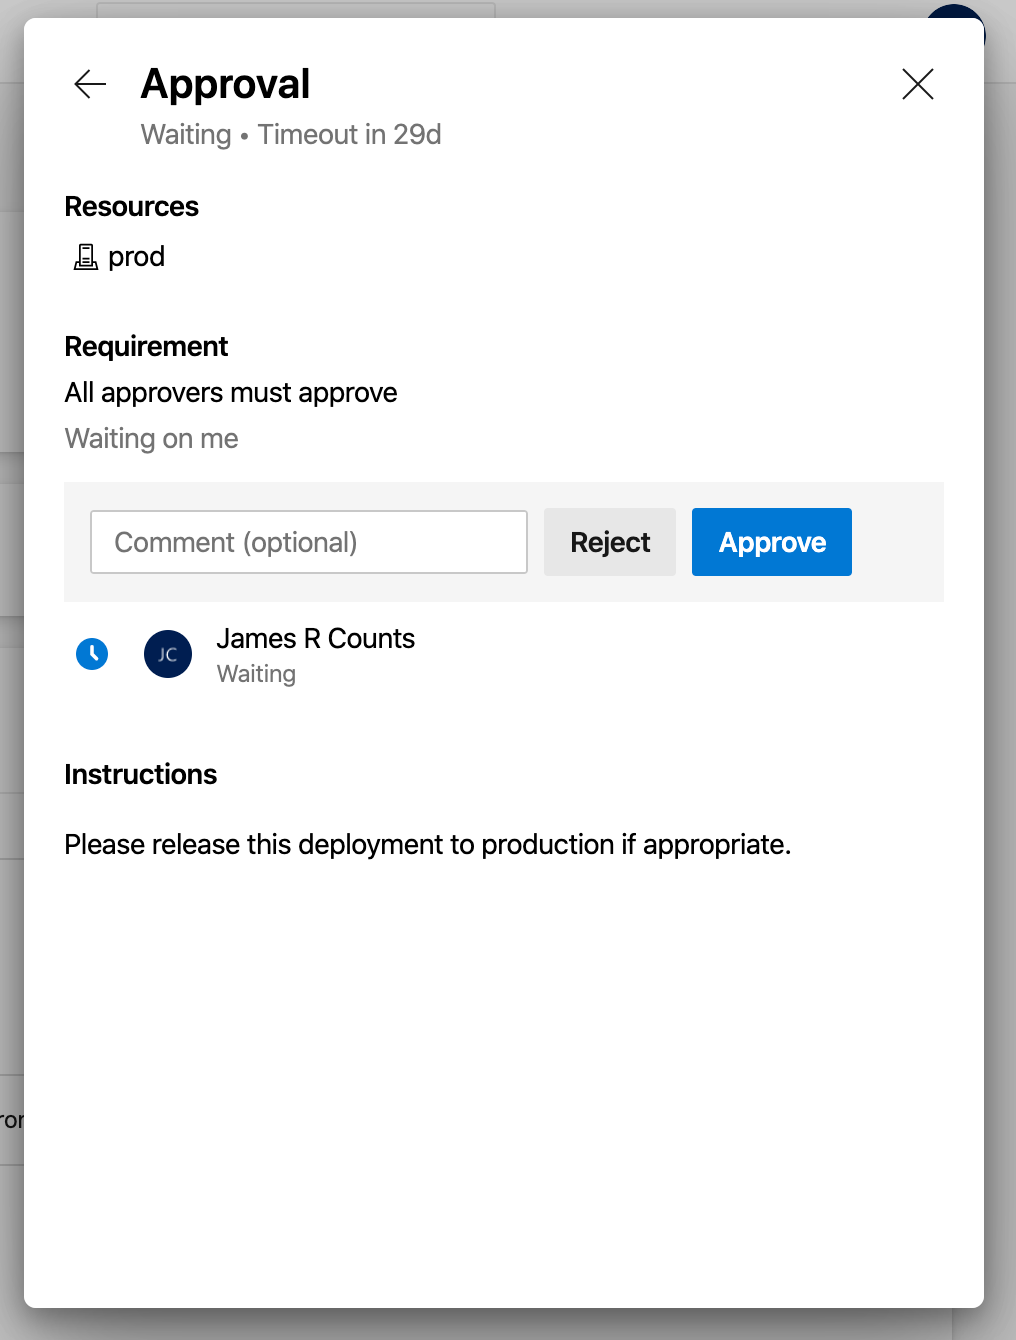
Once we choose “Approve” here, this release is rolling to production!

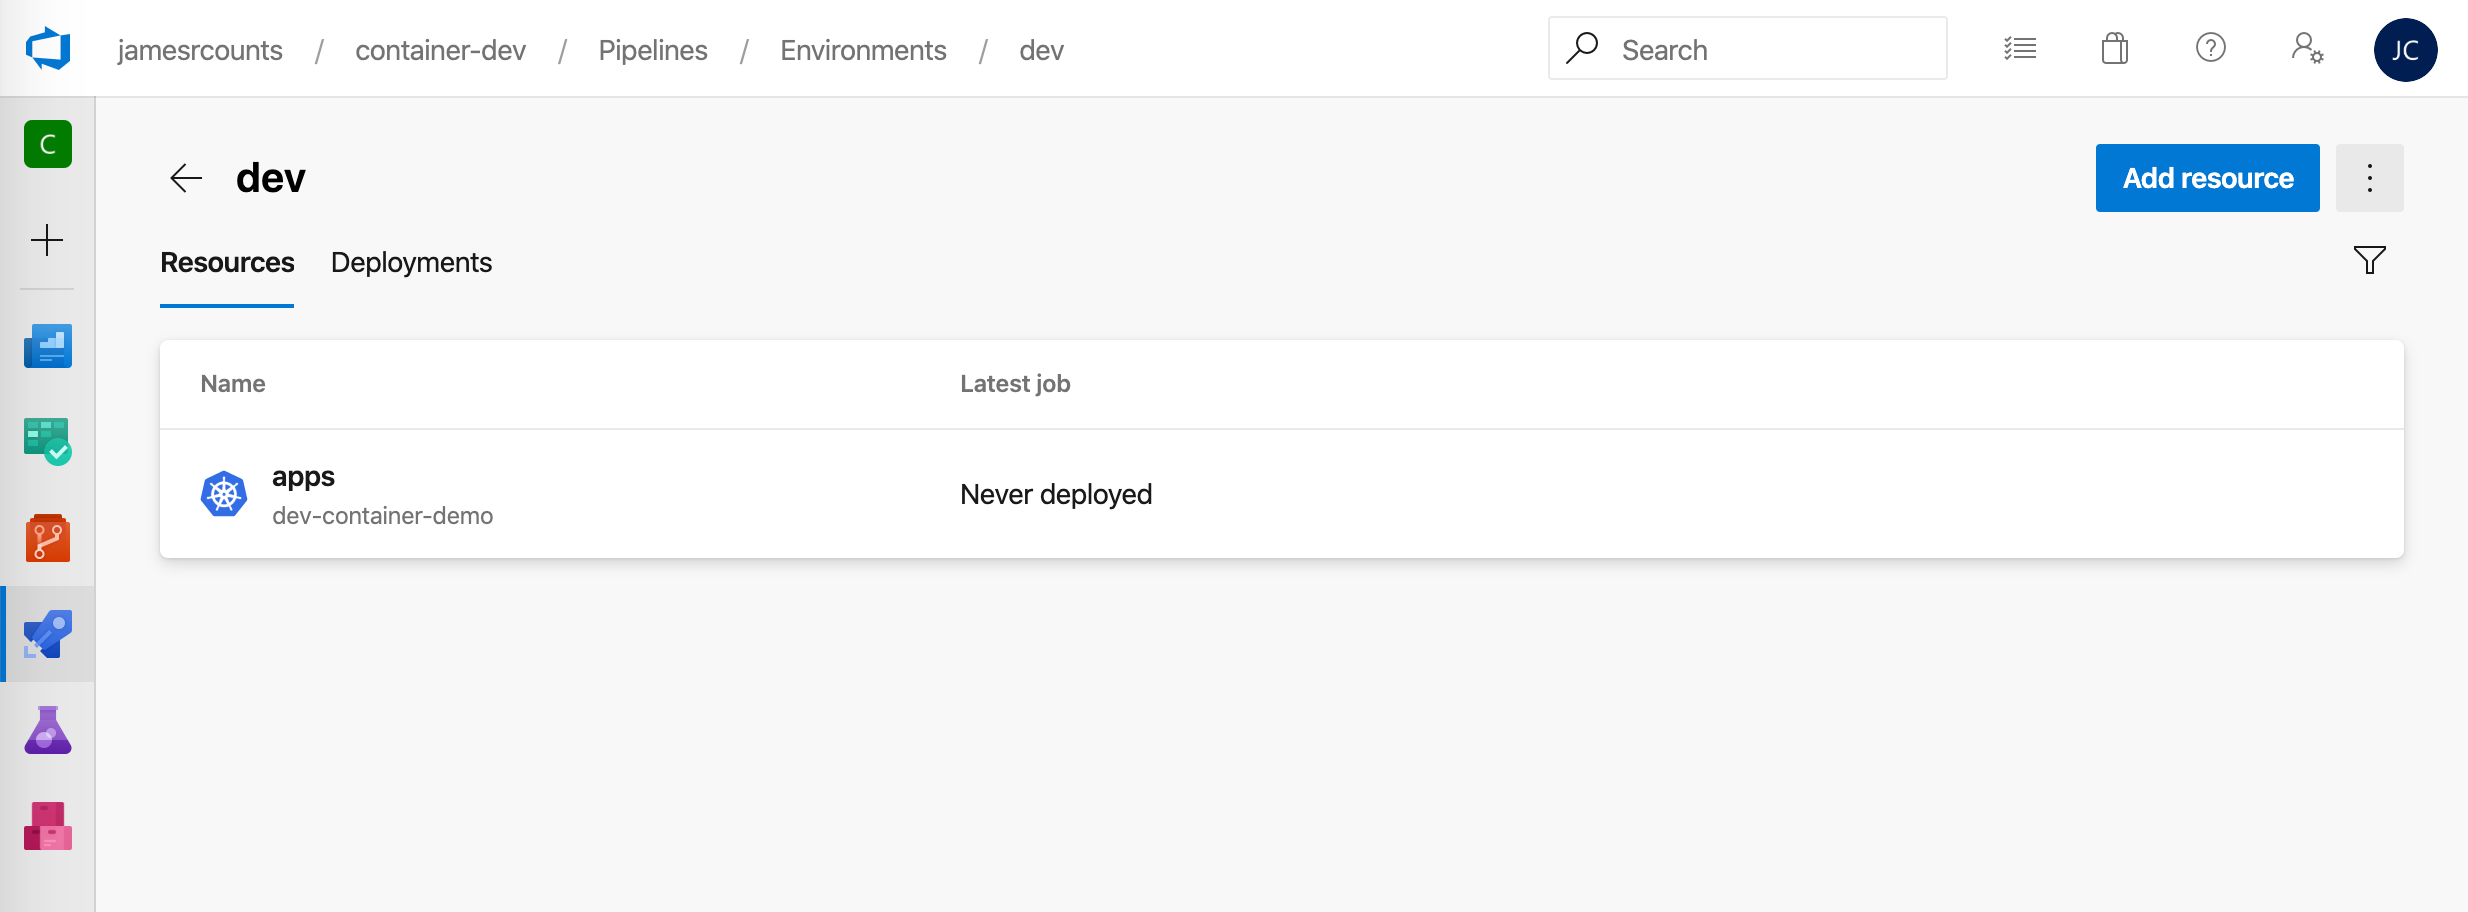
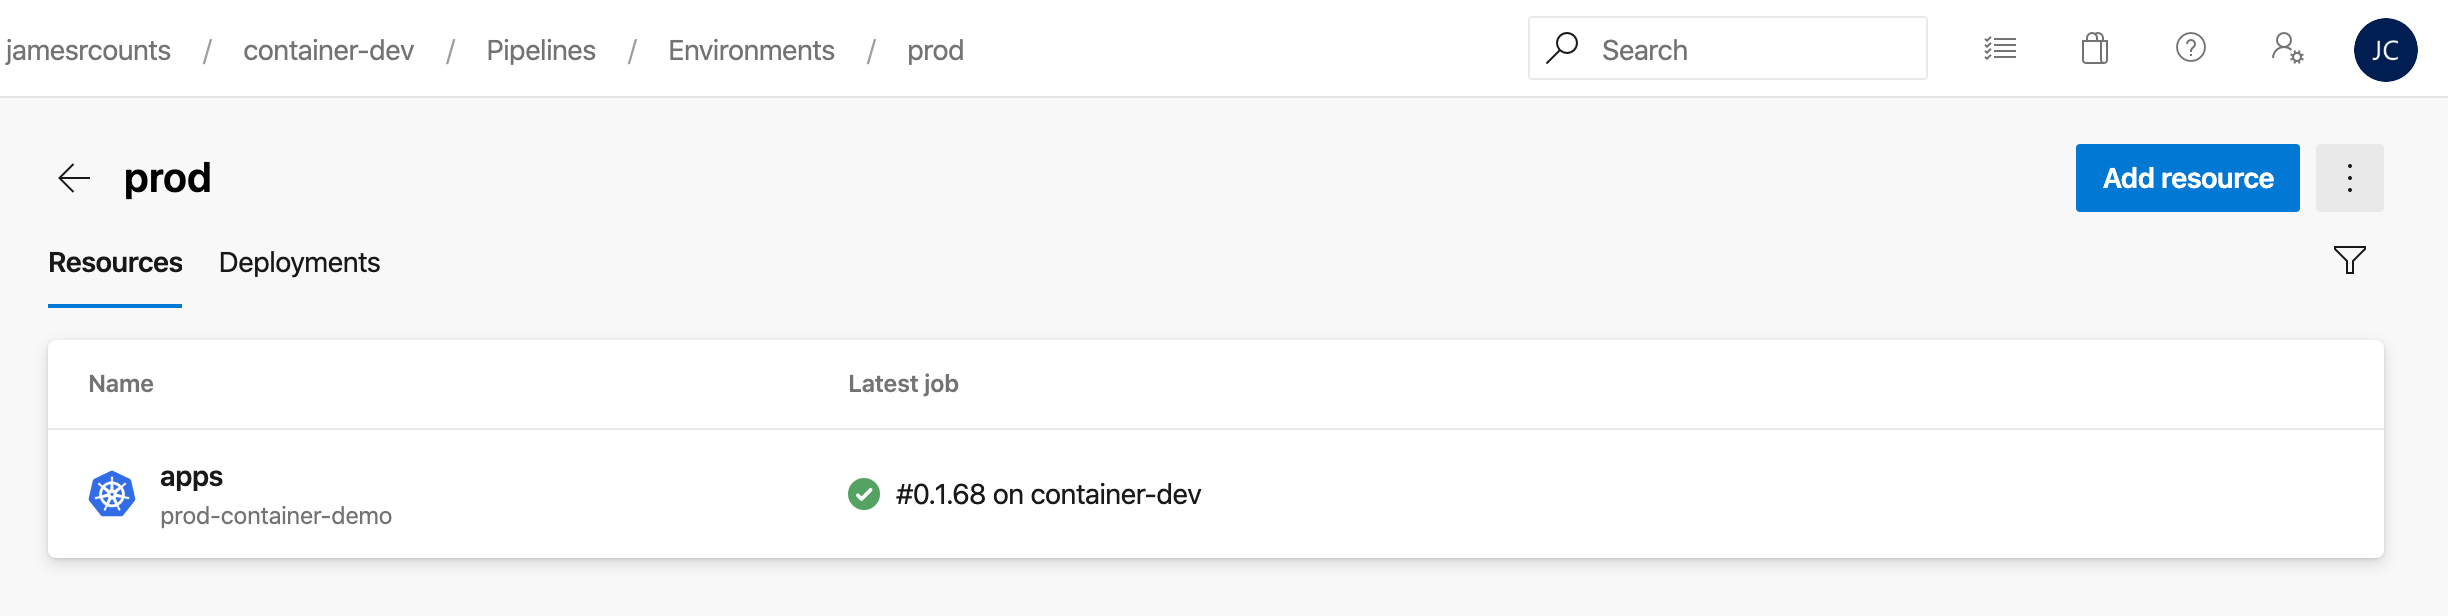
Once the application deployment completes, we can visit the environments in Azure DevOps and see the history of deployments, and where each version of the application is running.

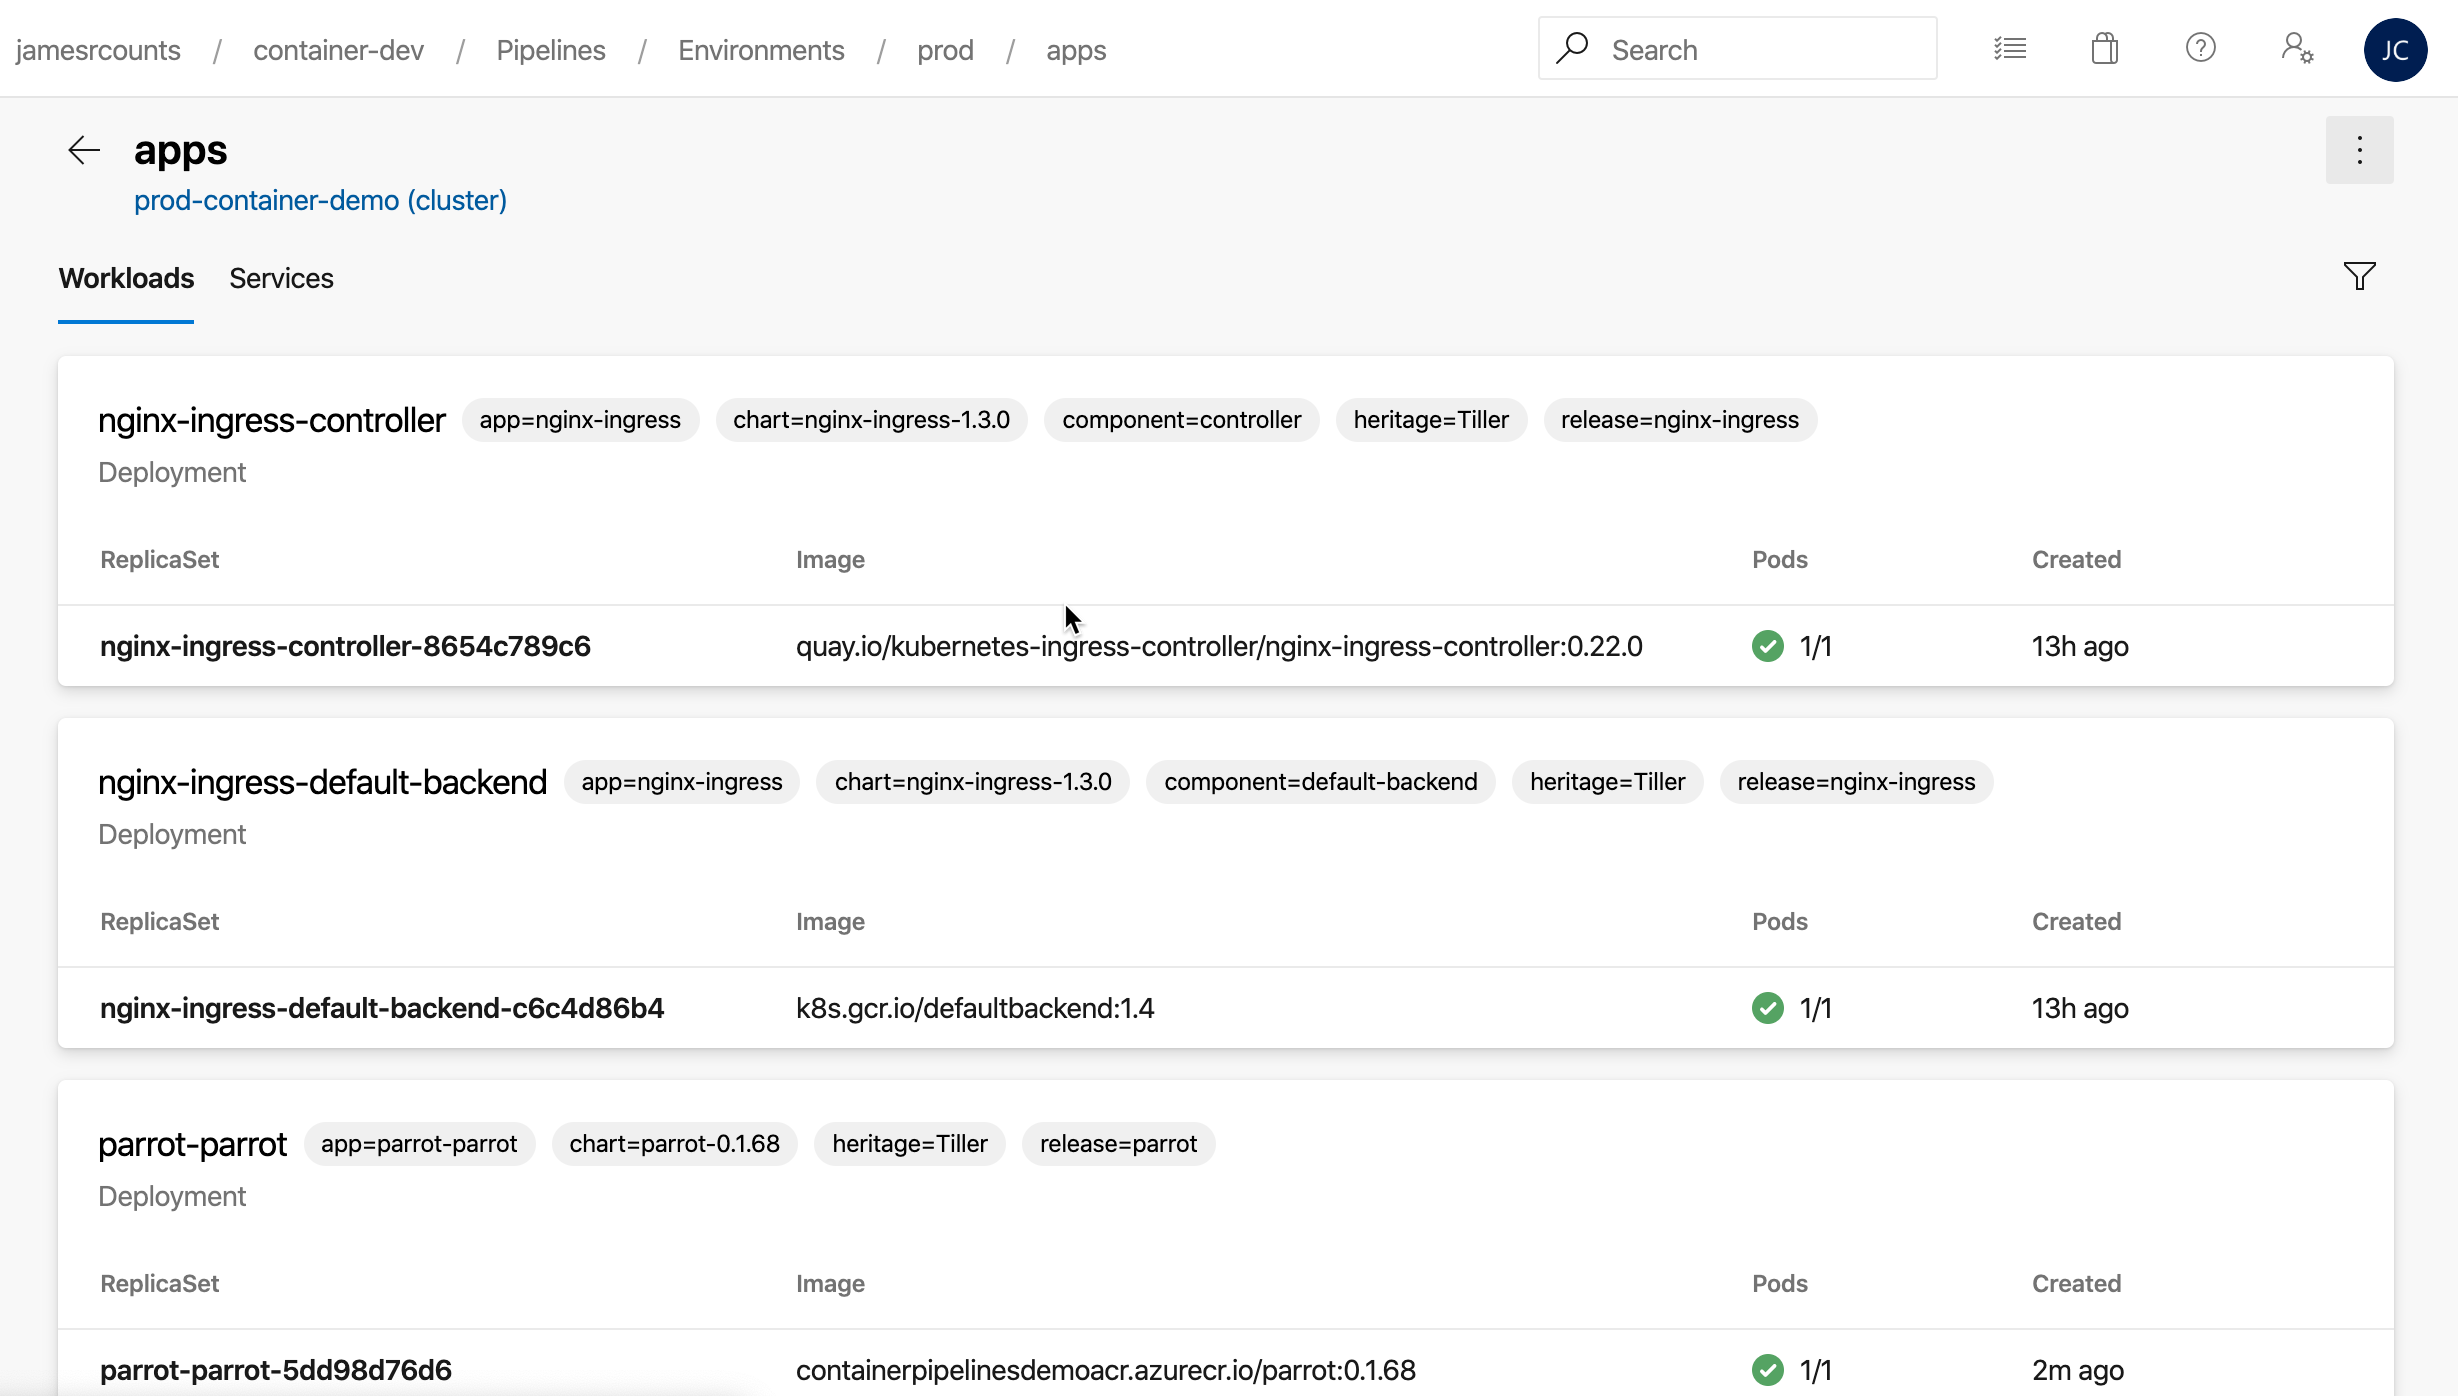
We can choose the production environment to see the “apps” namespace.
In the namespace, we can see all the running workloads in that namespace, including our application!
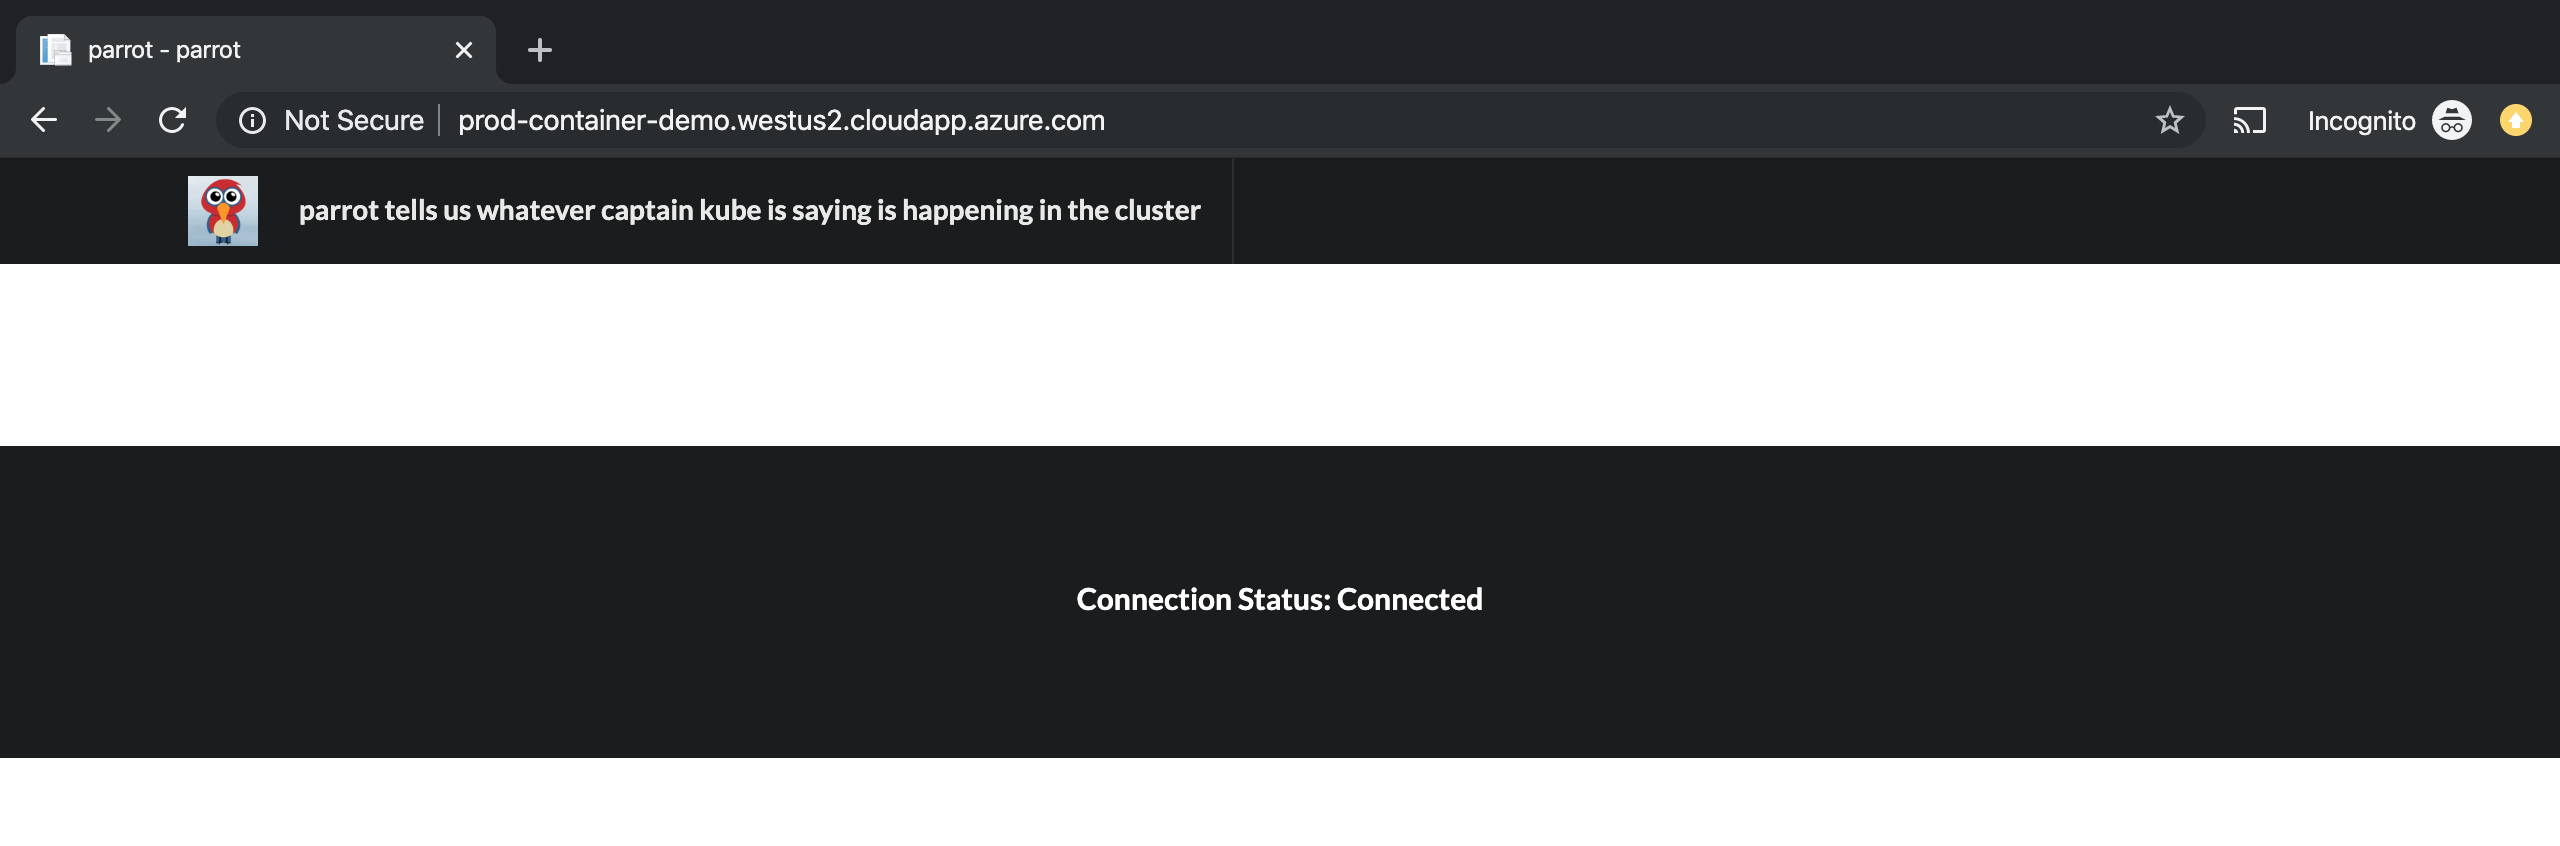
Of course, we can see the parrot application running in the browser too. Still, as noted in the beginning, it doesn’t do anything interesting.
Looking Ahead
Azure Pipelines have come a long way over the past year. The ability to provide both build and deployment definitions in YAML improves maintainability. The new Environments feature provides a logical separation between defining steps and governing deployment targets. Features like caching still have preview status but already show promise.
At the moment, though, the governance options for the Environments feature still has many fewer options that were available in the “classic” Release pipelines. However, at the rate of change observed in Azure DevOps recently, I look forward to seeing Environments reach feature parity soon.