Terraform Pipelines with Azure DevOps: Getting Started

In 2019 I became frustrated with articles about integrating Terraform and Azure DevOps. None of the examples looked safe because they skipped what I feel is the most critical part of working with Terraform: reviewing the plan before deployment. So, I wrote my guide to show how I would (and how I do) integrate Terraform with Azure DevOps pipelines.
Both Terraform and Azure DevOps have continued to evolve since 2019, so it’s time for a refresh! Let’s look at how things look today.
- How Does Terraform Work?
- Building a safe Terraform pipeline
How Does Terraform Work?
You might already know how Terraform works. But I like to review the workflow before building pipelines. An engineer using Terraform to drive infrastructure configuration changes will work through the following steps:
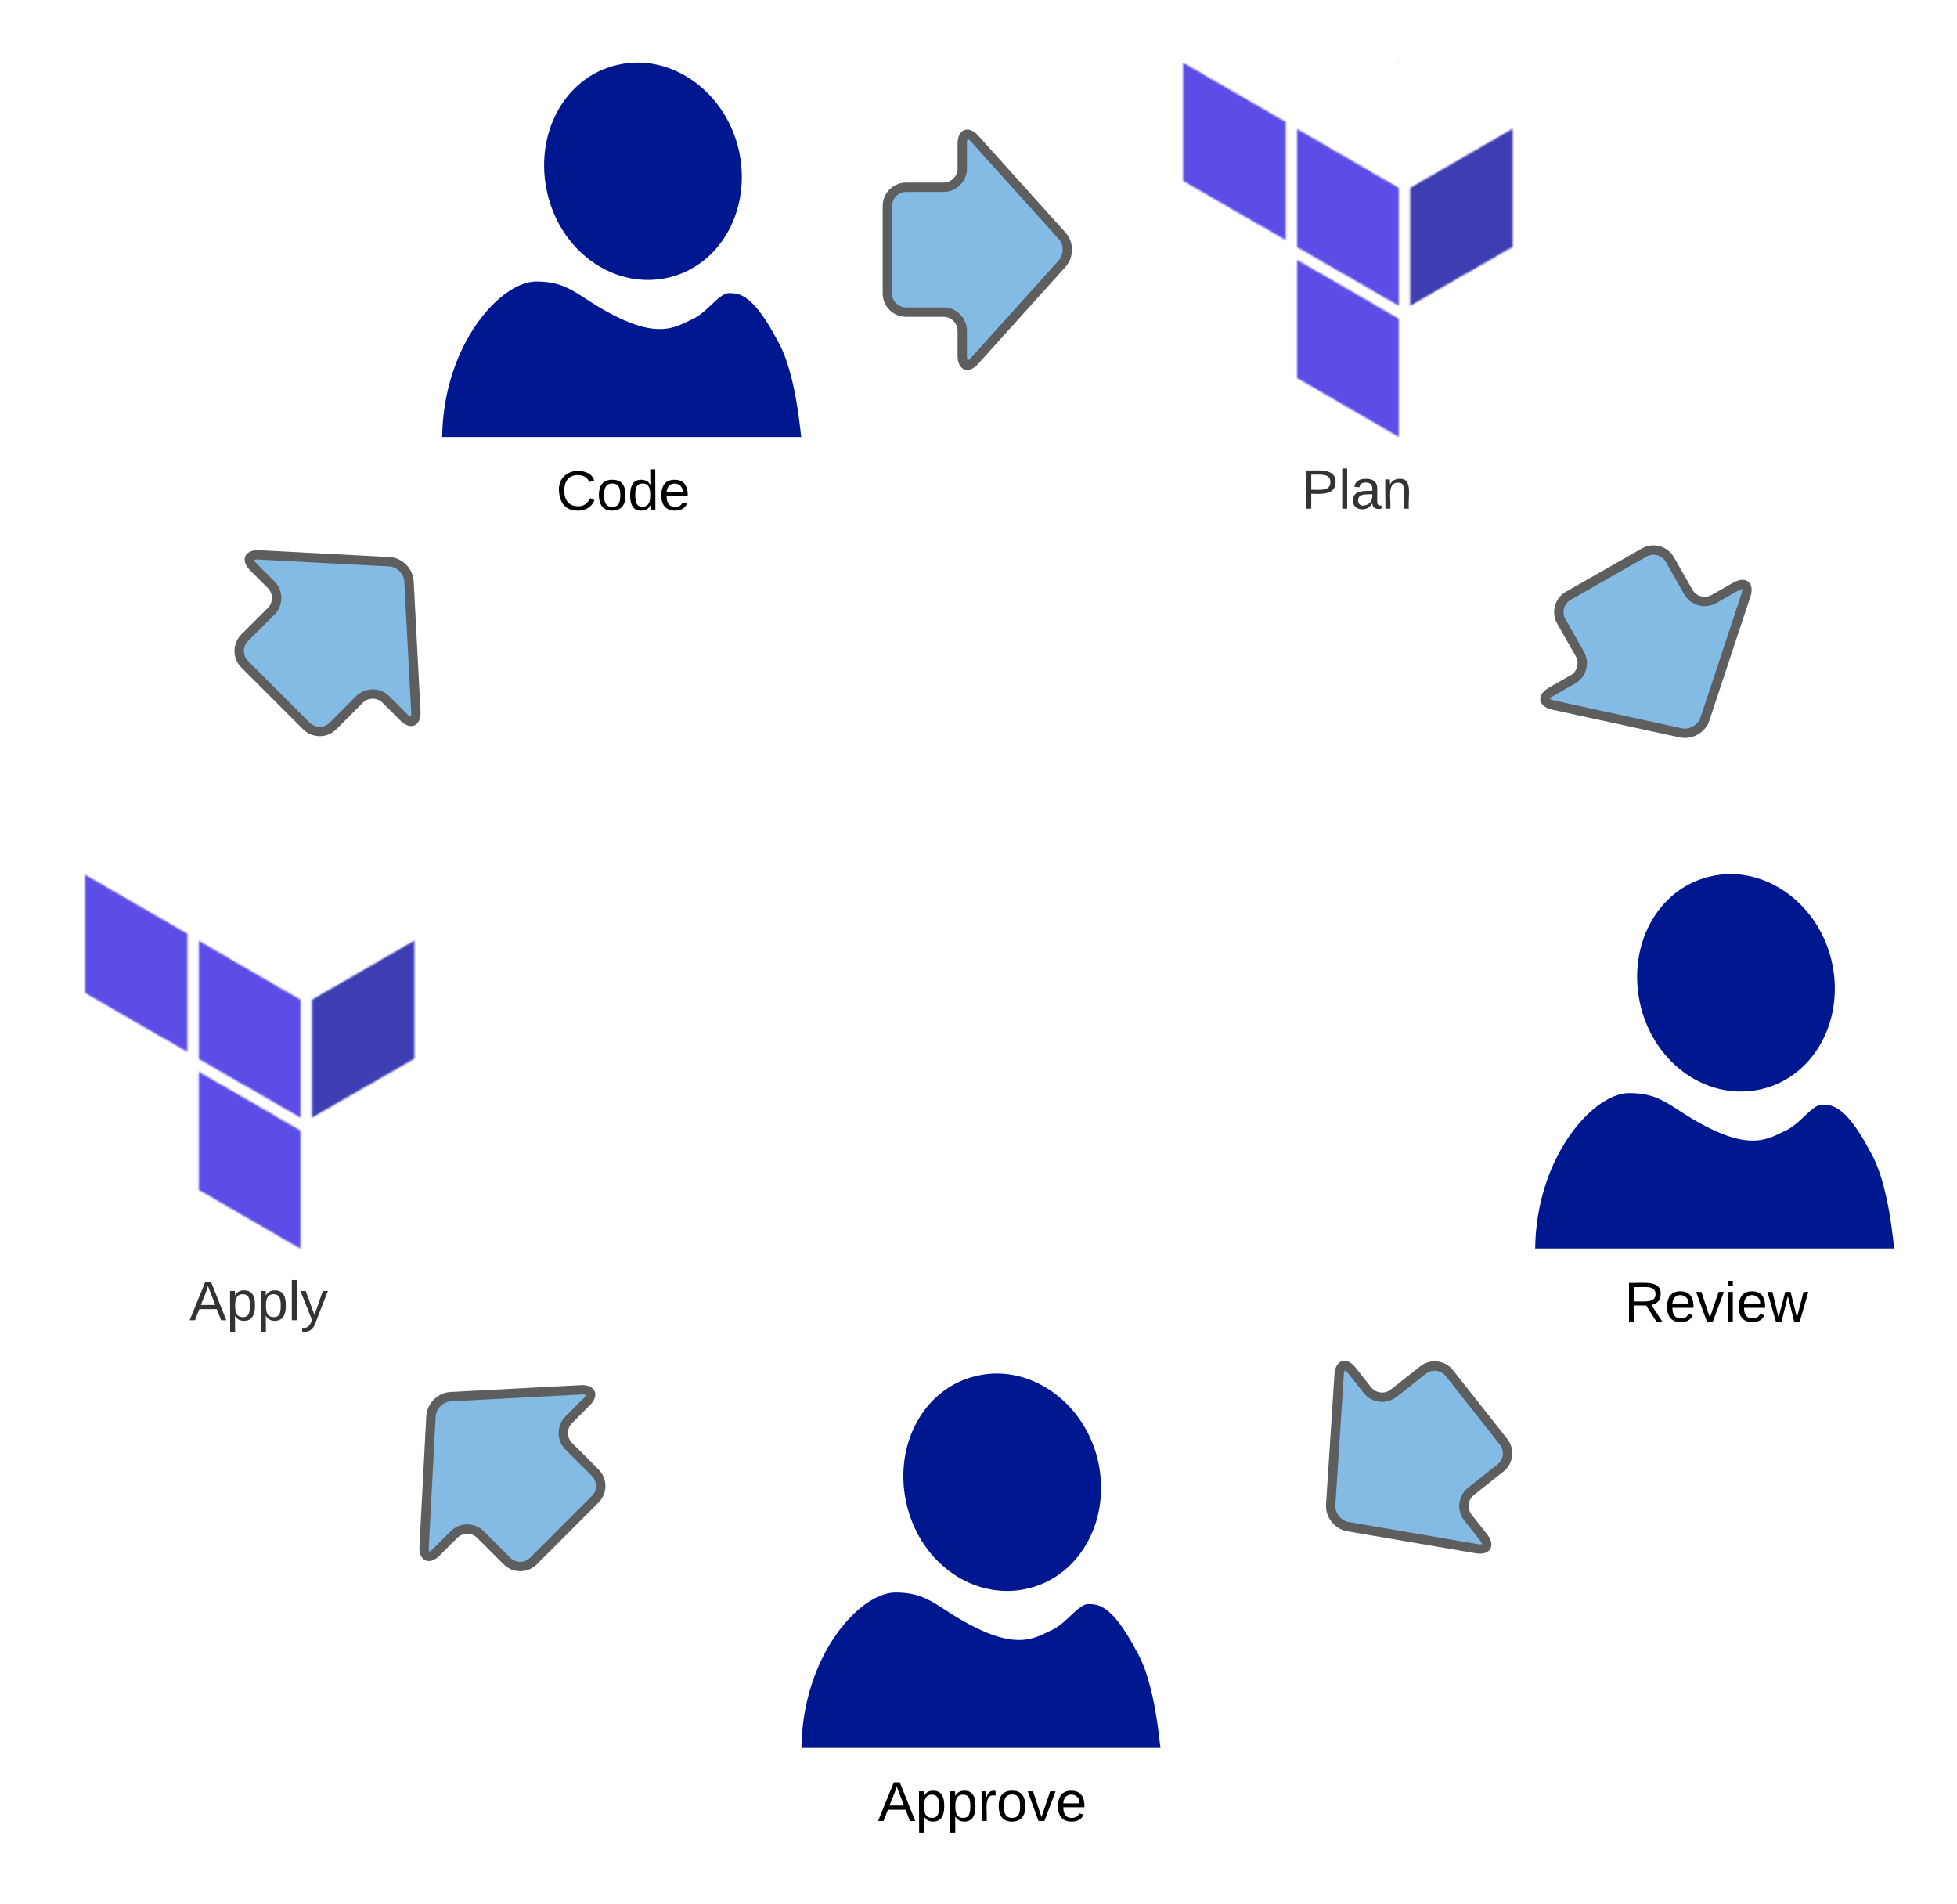
Code
Write or modify Terraform configuration written in the HashiCorp Configuration Language (HCL)
Plan
Terraform will evaluate the configuration against the current deployed configuration and the last known state of the deployment.
Review
Terraform provides a report of the differences between the current infrastructure state and the changes implied by the latest code, and any differences caused by infrastructure drift from any other source.
Approve
After reviewing the plan, the engineer decides to deploy the changes. Alternatively, the engineer may not like Terraform’s proposed changes and can choose to skip the deployment and go back to coding.
Apply
After receiving approval, Terraform updates the infrastructure and records its changes in a state file for use with the next iteration of the development cycle.
This workflow is interactive. Terraform prints the proposed changes to the console, and the engineer types ‘yes’ to indicate approval. Interactivity is a problem for build pipelines!
We can’t just sacrifice the approval step because Terraform doesn’t have an intrinsic method to decide the proposed changes are safe. This knowledge comes from the engineer. Below, I’ll show how to make Terraform “non-interactive” in a build pipeline without sacrificing safety.
Building a safe Terraform pipeline
Terraform creates a plan which outlines what changes the tool will make to the infrastructure. Because Terraform cannot decide whether changes are safe, the operator (you) must make this decision. Supporting this plan inspection is the primary goal of the setup described below, but it isn’t the only problem. Let’s work through an example Terraform configuration with the following components:

- A virtual network
- A subnet
- A public IP
- A network security group that allows SSH
- A network interface
- A virtual machine
Setup Remote State
To get this project ready for automation, we need to set it up to use a remote backend for state storage. Terraform automation requires an external state store because the build agents are transient, and the entire agent pool must share state changes. You should create a script using your favorite tool (Azure CLI, PowerShell, or even Terraform itself) to create an Azure Storage Account. The account should support the following features at a minimum:
- Encryption at rest
- Transparent geo-replication (RA-GZRS)
- Soft delete for blobs and containers
- Blob versioning
- HTTPS only access
- Private access only
- Minimum TLS version 1.2
Real-world deployments for security-conscious organizations will also include:
- Storage account firewall
- Advanced Threat Protection
- Customer managed encryption keys
- Azure Monitor diagnostics and logging
If you ignore all other advice about storage account configuration and enable just one feature from the lists above, make sure to use blob versioning.
Blob versions allow you to recover older versions of the state file. Older state file versions can help you reset your configuration when other recovery options fail.
To configure backend storage, add a backend block to the terraform
block. To see where I have this configured in the example, check the
versions file in the infrastructure folder (shown below).
terraform {
  required_version = ">= 0.15"

  backend "azurerm" {}

  required_providers {
    azurerm = {
      source  = "hashicorp/azurerm"
      version = "~> 2"
    }
    random = {
      source  = "hashicorp/random"
      version = "~> 3"
    }
  }
}
This backend block supports variables that specify the resource group, account, container and blob name. However, rather than specify them as hardcoded values I’ve created an external file for these values.
infrastructure/azurerm.backend.tfvars:
container_name       = "state"
key                  = "terraform-pipelines.tfstate"
storage_account_name = "saexcitedcougar"
resource_group_name  = "rg-backend-excited-cougar"
By declaring the backend configuration outside the configuration code base, I can choose different backends for different environments. For example, my local machine may use a sandbox, while my build pipeline targets a live deployment.
In the case of a local run on my laptop, Terraform uses Azure CLI
authentication to access this backend. I will need to authenticate using
az login before invoking Terraform. In a build pipeline, we’ll provide
Service Principal credentials using environment variables.
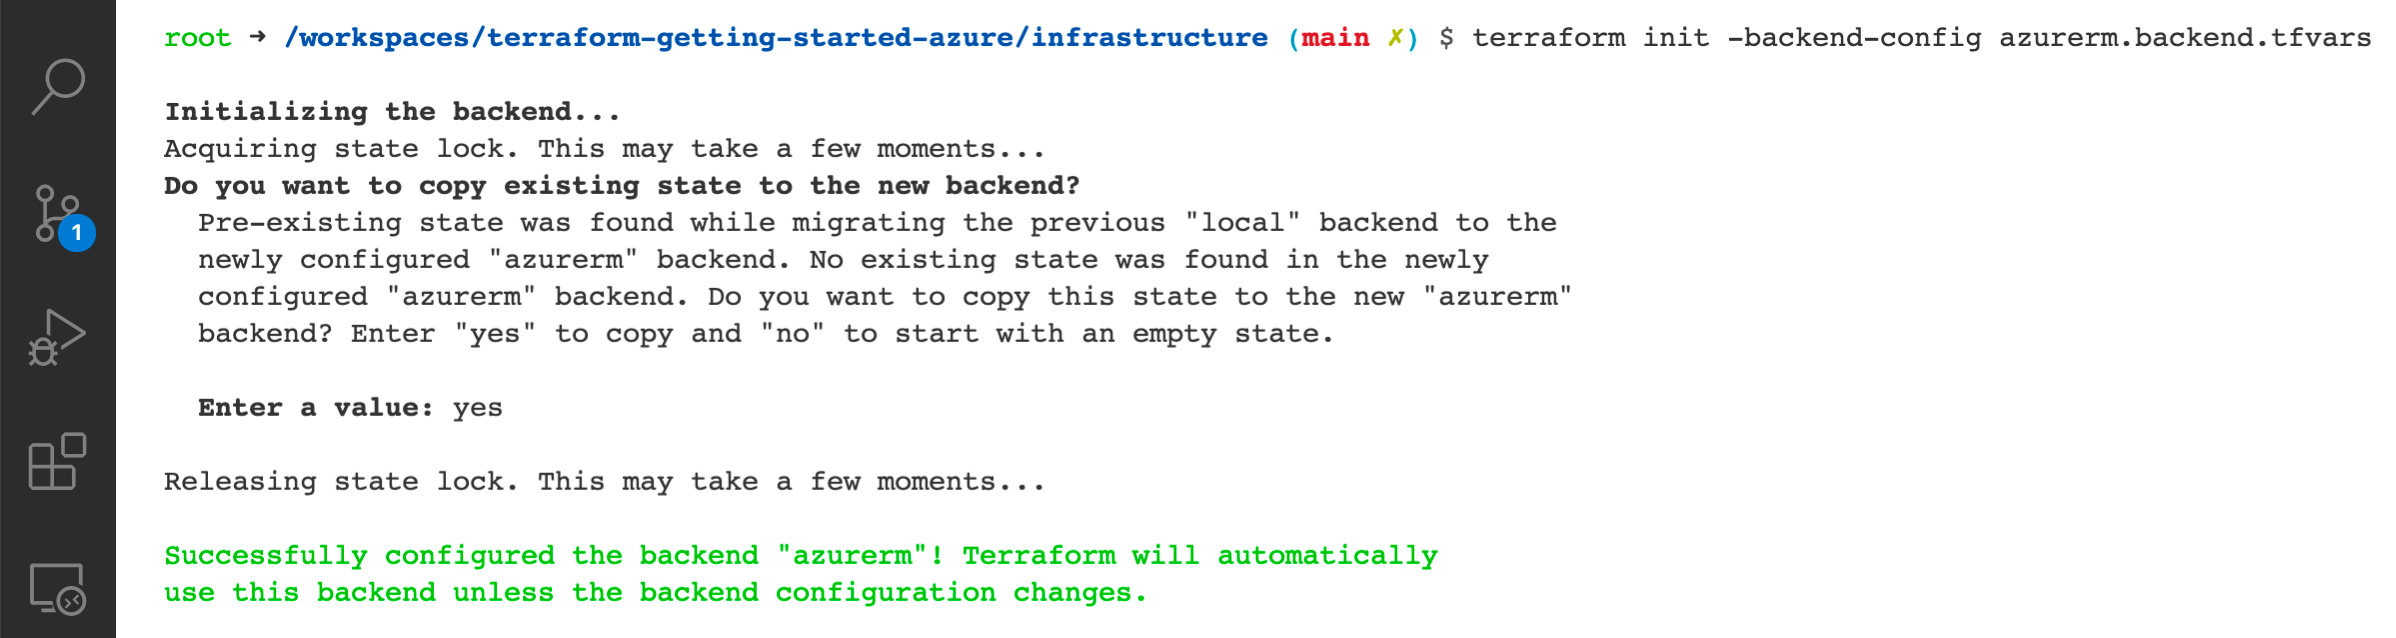
If you already have a local state file, execute terraform init -backend-config azurerm.backend.tfvars to update your backend. Terraform
will prompt you to move your state file into the storage account.
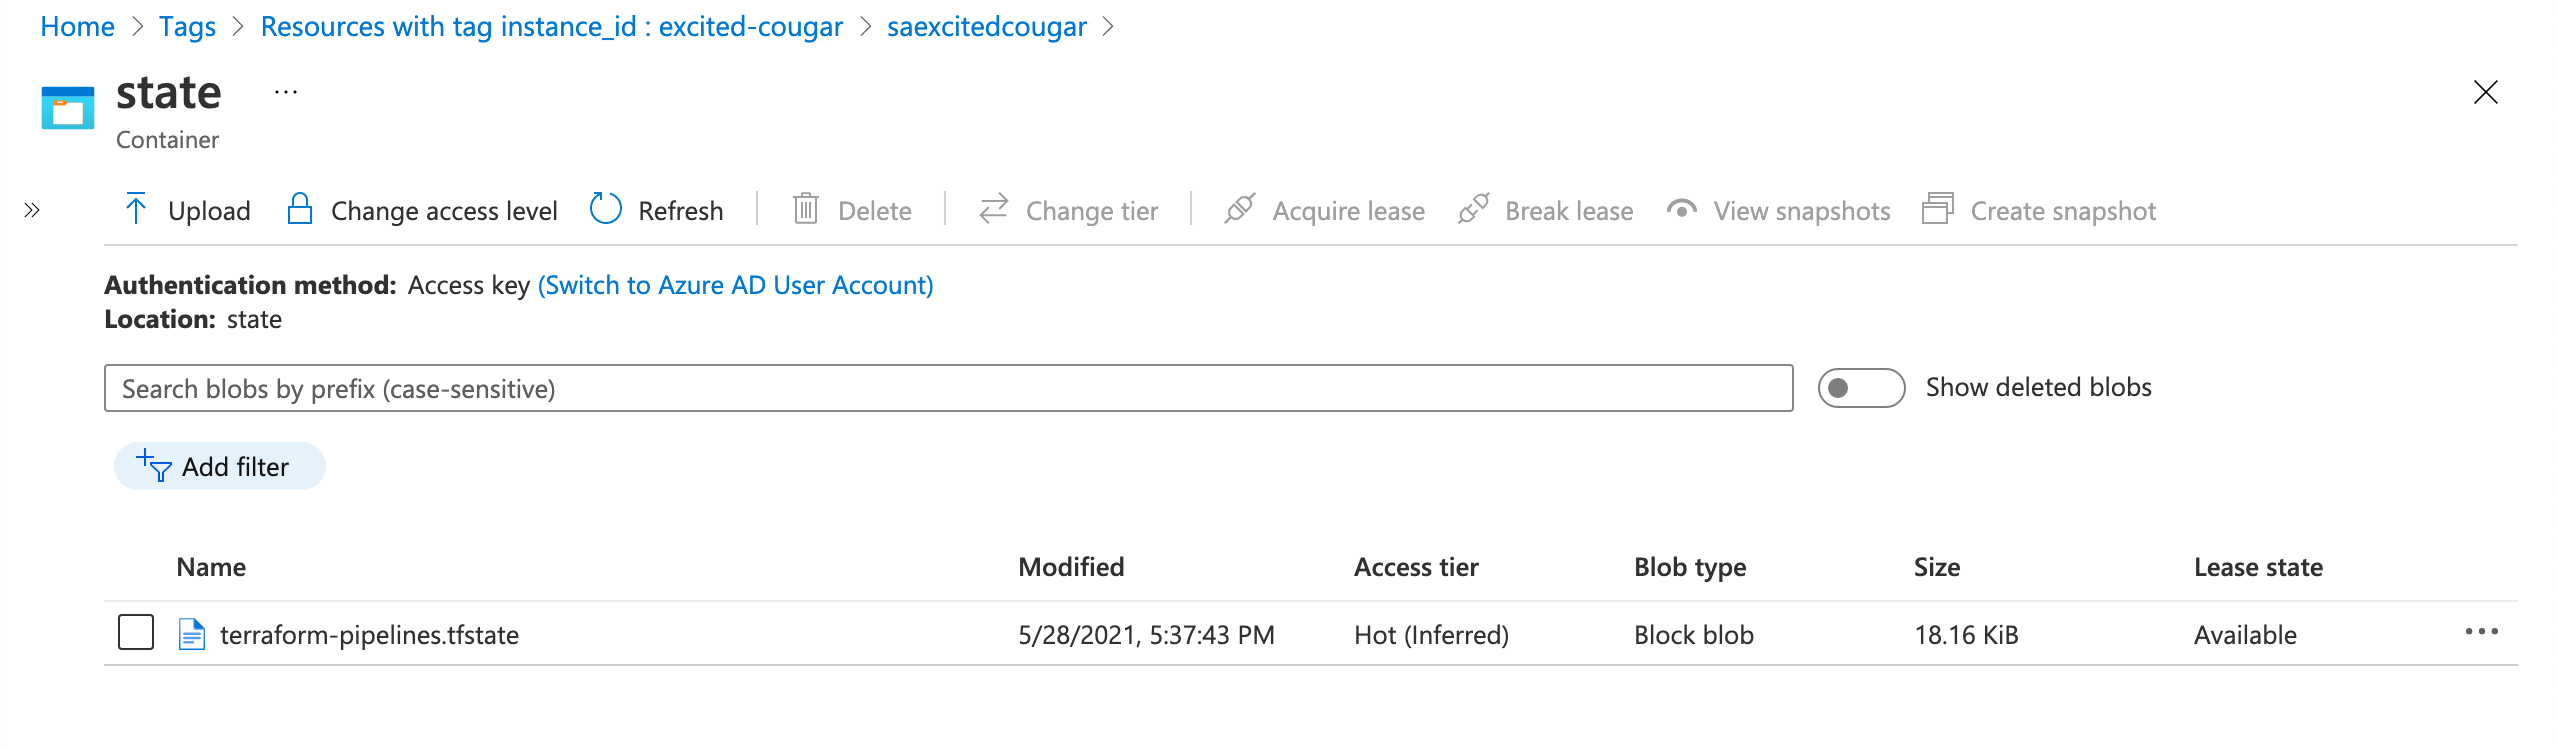
By visiting the state blob container in the account, you can verify the
state file successfully saved using the specified key.
With the remote state now set up, the following section explains how to create the build stage.
Create Infrastructure Build Stage
We could call the build stage for a Terraform pipeline the planning
stage because the build artifacts produced by this stage are Terraform
plans. After the build stage completes, a later release stage can
consume that plan without recalculating the infrastructure changes. By
invoking terraform apply with an explicit plan, we also solve the
approval problem posed at the beginning of this article because
Terraform skips the interactive prompt when invoked this way.
According to the Terraform docs: Explicit execution plan files can be used to split plan and apply into separate steps within automation systems.
The execution plan doesn’t solve the requirement to review the plan. We’ll see how to do that soon. For now, let’s look at the build stage steps.
infrastructure/azure-pipelines.yml:
  - stage: build

    jobs:
      - job: plan
        displayName: 'Infrastructure Plan'
        steps:
          - checkout: self
            fetchDepth: 1

          - template: '../pipeline-templates/prepare-credentials.yml'
          - template: '../pipeline-templates/pin-terraform.yml'
          - template: '../pipeline-templates/terraform-init.yml'

          - task: Bash@3
            name: 'terraform_plan'
            displayName: 'Terraform Plan'
            env:
              ARM_CLIENT_ID: $(AZURE_CLIENT_ID)
              ARM_CLIENT_SECRET: $(AZURE_CLIENT_SECRET)
              ARM_SUBSCRIPTION_ID: $(AZURE_SUBSCRIPTION_ID)
              ARM_TENANT_ID: $(AZURE_TENANT_ID)
            inputs:
              targetType: 'inline'
              workingDirectory: $(project_folder)
              script: |
                set -euo pipefail

                if [ ${BUILD_REASON} == 'PullRequest' ]; then
                  export TF_CLI_ARGS="-lock=false"
                fi

                terraform plan \
                  -input=false \
                  -var="resource_group_name=${AZURE_ENV_RG}" \
                  -out ${BUILD_BUILDNUMBER}.tfplan

          - template: '../pipeline-templates/publish-plan.yml'
This stage has these steps:
- Shallow Clone
- Add Service Principal credentials to the environment
- Pin Terraform to a specific version
- Terraform init
- Terraform plan
- Publish the Terraform configuration and plan file
Several setup steps are shared between build and deploy stages, so I’ve implemented them as templates. The following sections explain each step.
Shallow Clone
infrastructure/azure-pipelines.yml:
- checkout: self
  fetchDepth: 1
Whether it is automating Terraform or some other tool, a pipeline rarely
needs the entire git history to do its job. So, why slow down your
pipeline by downloading unneeded bits? As shown above, configuring a
checkout step with fetchDepth set to one instructs Azure DevOps to only
fetch the latest working copy from the git repo.
Add Service Principal credentials to the environment
pipeline-templates/prepare-credentials.yml:
steps:
  - task: AzureCLI@2
    displayName: 'Prepare Credentials'
    inputs:
      addSpnToEnvironment: true
      azureSubscription: 'Azure'
      scriptLocation: 'inlineScript'
      scriptType: 'bash'
      inlineScript: |
        set -euo pipefail
        echo "##vso[task.setvariable variable=AZURE_CLIENT_ID;issecret=true]${servicePrincipalId}"
        echo "##vso[task.setvariable variable=AZURE_CLIENT_SECRET;issecret=true]${servicePrincipalKey}"
        echo "##vso[task.setvariable variable=AZURE_SUBSCRIPTION_ID;issecret=true]$(az account show --query 'id' -o tsv)"
        echo "##vso[task.setvariable variable=AZURE_TENANT_ID;issecret=true]${tenantId}"
We will see in later steps that terraform init and terraform plan each consume the same Azure credentials in the same way: as environment variables. These steps will use Service Principal credentials to authenticate with Azure, and Azure DevOps represents those credentials as a Service Connection I configured and named Azure.
This step converts the Service Connection credentials into pipeline secrets by using an Azure CLI task to log into Azure and then using special logging directives to set these values as pipeline secrets.
Alternatively, we could maintain a separate variable group to hold these secrets or repeat this script in later steps. Since real-world pipelines will often require a Service Connection for other tasks extracting them this way means we only need to configure the credentials in one secure location.
Pin Terraform to a specific version
pipeline-templates/pin-terraform.yml:
steps:
  - task: Bash@3
    displayName: 'Pin Terraform'
    inputs:
      targetType: 'inline'
      script: |
        set -euo pipefail

        curl -SL "https://releases.hashicorp.com/terraform/${TERRAFORM_VERSION}/terraform_${TERRAFORM_VERSION}_linux_amd64.zip" --output terraform.zip
        echo "${TERRAFORM_DOWNLOAD_SHA} terraform.zip" | sha256sum -c -
        unzip "terraform.zip"
        sudo mv terraform /usr/local/bin
        terraform --version
        rm terraform.zip
Azure DevOps hosted build agents include a version of Terraform by default. This build step ensures consistent results if you use a newer or older version of Terraform than Microsoft provides for you. The script relies on two pipeline variables to define the Terraform version and the hash value used to check the downloaded package integrity. These two variables are defined in a variable group and referenced by our pipeline definition outside this template.
Terraform init
pipeline-templates/terraform-init.yml:
steps:
  - task: Bash@3
    displayName: 'Terraform Init'
    env:
      ARM_CLIENT_ID: $(AZURE_CLIENT_ID)
      ARM_CLIENT_SECRET: $(AZURE_CLIENT_SECRET)
      ARM_SUBSCRIPTION_ID: $(AZURE_SUBSCRIPTION_ID)
      ARM_TENANT_ID: $(AZURE_TENANT_ID)
    inputs:
      targetType: 'inline'
      workingDirectory: $(project_folder)
      script: |
        set -euo pipefail

        echo "Initialize"
        terraform init \
            -input=false \
            -backend-config="resource_group_name=${TF_STORAGE_RG}" \
            -backend-config="storage_account_name=${TF_STORAGE_ACCOUNT}" \
            -backend-config="container_name=${TF_STORAGE_BLOB_CONTAINER}" \
            -backend-config="key=${TF_STORAGE_BLOB_NAME}"

        echo "Sanity Check"
        terraform validate

        echo "Show Terraform Version and Providers"
        terraform -v
        terraform providers
Our build agent will start with a clean slate on each build, so this script initializes our Terraform project so that planning can succeed. Because Azure DevOps encrypts pipeline secrets, we the env block to reference the Azure credentials in our bash task so that Azure DevOps knows to decrypt and inject the values into the script’s process.
Besides the credentials, we need to pass the backend config variables. In local execution, we used a variable file. Here in the pipeline, we provide each variable individually. I use a variable group in Azure DevOps to configure these values, and the pipeline definition references this group outside the template.
After init executes, this script validates the syntax and consistency of the Terraform configuration. This check can catch simple mistakes without waiting for a complete plan. Finally, the script generates some debug information useful if you ever suspect that Terraform has a bug and you would like to report it.
Note the command line switch -input=false. This option informs
Terraform that nobody is sitting at the console, ready to answer
prompts. Without this option, our build would timeout if Terraform
ever stopped to ask for confirmation. With prompts suppressed,
Terraform will usually produce an error and fail if it reaches a point
where it needs confirmation
Terraform plan
infrastructure/azure-pipelines.yml:
- task: Bash@3
  name: 'terraform_plan'
  displayName: 'Terraform Plan'
  env:
    ARM_CLIENT_ID: $(AZURE_CLIENT_ID)
    ARM_CLIENT_SECRET: $(AZURE_CLIENT_SECRET)
    ARM_SUBSCRIPTION_ID: $(AZURE_SUBSCRIPTION_ID)
    ARM_TENANT_ID: $(AZURE_TENANT_ID)
  inputs:
    targetType: 'inline'
    workingDirectory: $(project_folder)
    script: |
      set -euo pipefail

      if [ ${BUILD_REASON} == 'PullRequest' ]; then
        export TF_CLI_ARGS="-lock=false"
      fi

      terraform plan \
        -input=false \
        -var="resource_group_name=${AZURE_ENV_RG}" \
        -out ${BUILD_BUILDNUMBER}.tfplan
This task uses the same pattern as the initialization task to access the
Azure credentials. The var parameter provides Terraform with the name of
the resource group to deploy resources into, which is the only top-level
variable this simple configuration needs. The out parameter instructs
Terraform to write the planned changes to a file, which culminates the
work performed so far in this pipeline stage.
At the top of the script, the conditional statement instructs Terraform not to lock the state file if Azure DevOps executed the pipeline as part of a pull request validation build. Because subsequent commits to the pull request may cancel the validation build before Terraform finishes and removes the lease. Setting this environment variable skips the lease and avoids this problem.
Publish the Terraform configuration and plan file
pipeline-templates/publish-plan.yml:
steps:
  - task: ArchiveFiles@2
    condition: and(succeeded(), ne(variables['Build.Reason'], 'PullRequest'))
    displayName: 'Create Plan Artifact'
    inputs:
      rootFolderOrFile: '$(project_folder)'
      includeRootFolder: false
      archiveType: 'tar'
      tarCompression: 'gz'
      archiveFile: '$(Build.ArtifactStagingDirectory)/$(Build.BuildNumber).tgz'
      replaceExistingArchive: true

  - task: PublishPipelineArtifact@1
    condition: and(succeeded(), ne(variables['Build.Reason'], 'PullRequest'))
    displayName: 'Publish Plan Artifact'
    inputs:
      targetPath: '$(Build.ArtifactStagingDirectory)'
      artifactName: 'plan'
The build stage ends by producing an artifact. According to the HashiCorp docs, the saved plan file is not executable on its own. Terraform needs the plan and the working directory contents available when applying changes. Furthermore, the working directory must preserve file permissions and executable bits, or the apply step will fail.
This template creates an archive of the working directory to include all the files Terraform needs. We specify a tar archive to preserve the needed bits. Finally, the next step uploads the tarball as a pipeline artifact.
Setup Deployment Environment
Azure DevOps Environments give us a chance to review the Terraform plan before the deploy stage runs. When a deployment stage targets an environment, all the configured approvals and checks must pass before the deployment stage runs. To simulate Terraform’s interactive approval flow from the command line, we only need to create an environment, set up an approval check, and ensure our pipeline stage references the new environment.
Environment configuration happens outside the pipeline definition, allowing for segregation of duties between pipeline authors and those authorized to configure deployment approvals.
First, log in to Azure DevOps and choose Environments under pipelines,
then select Create Environment:
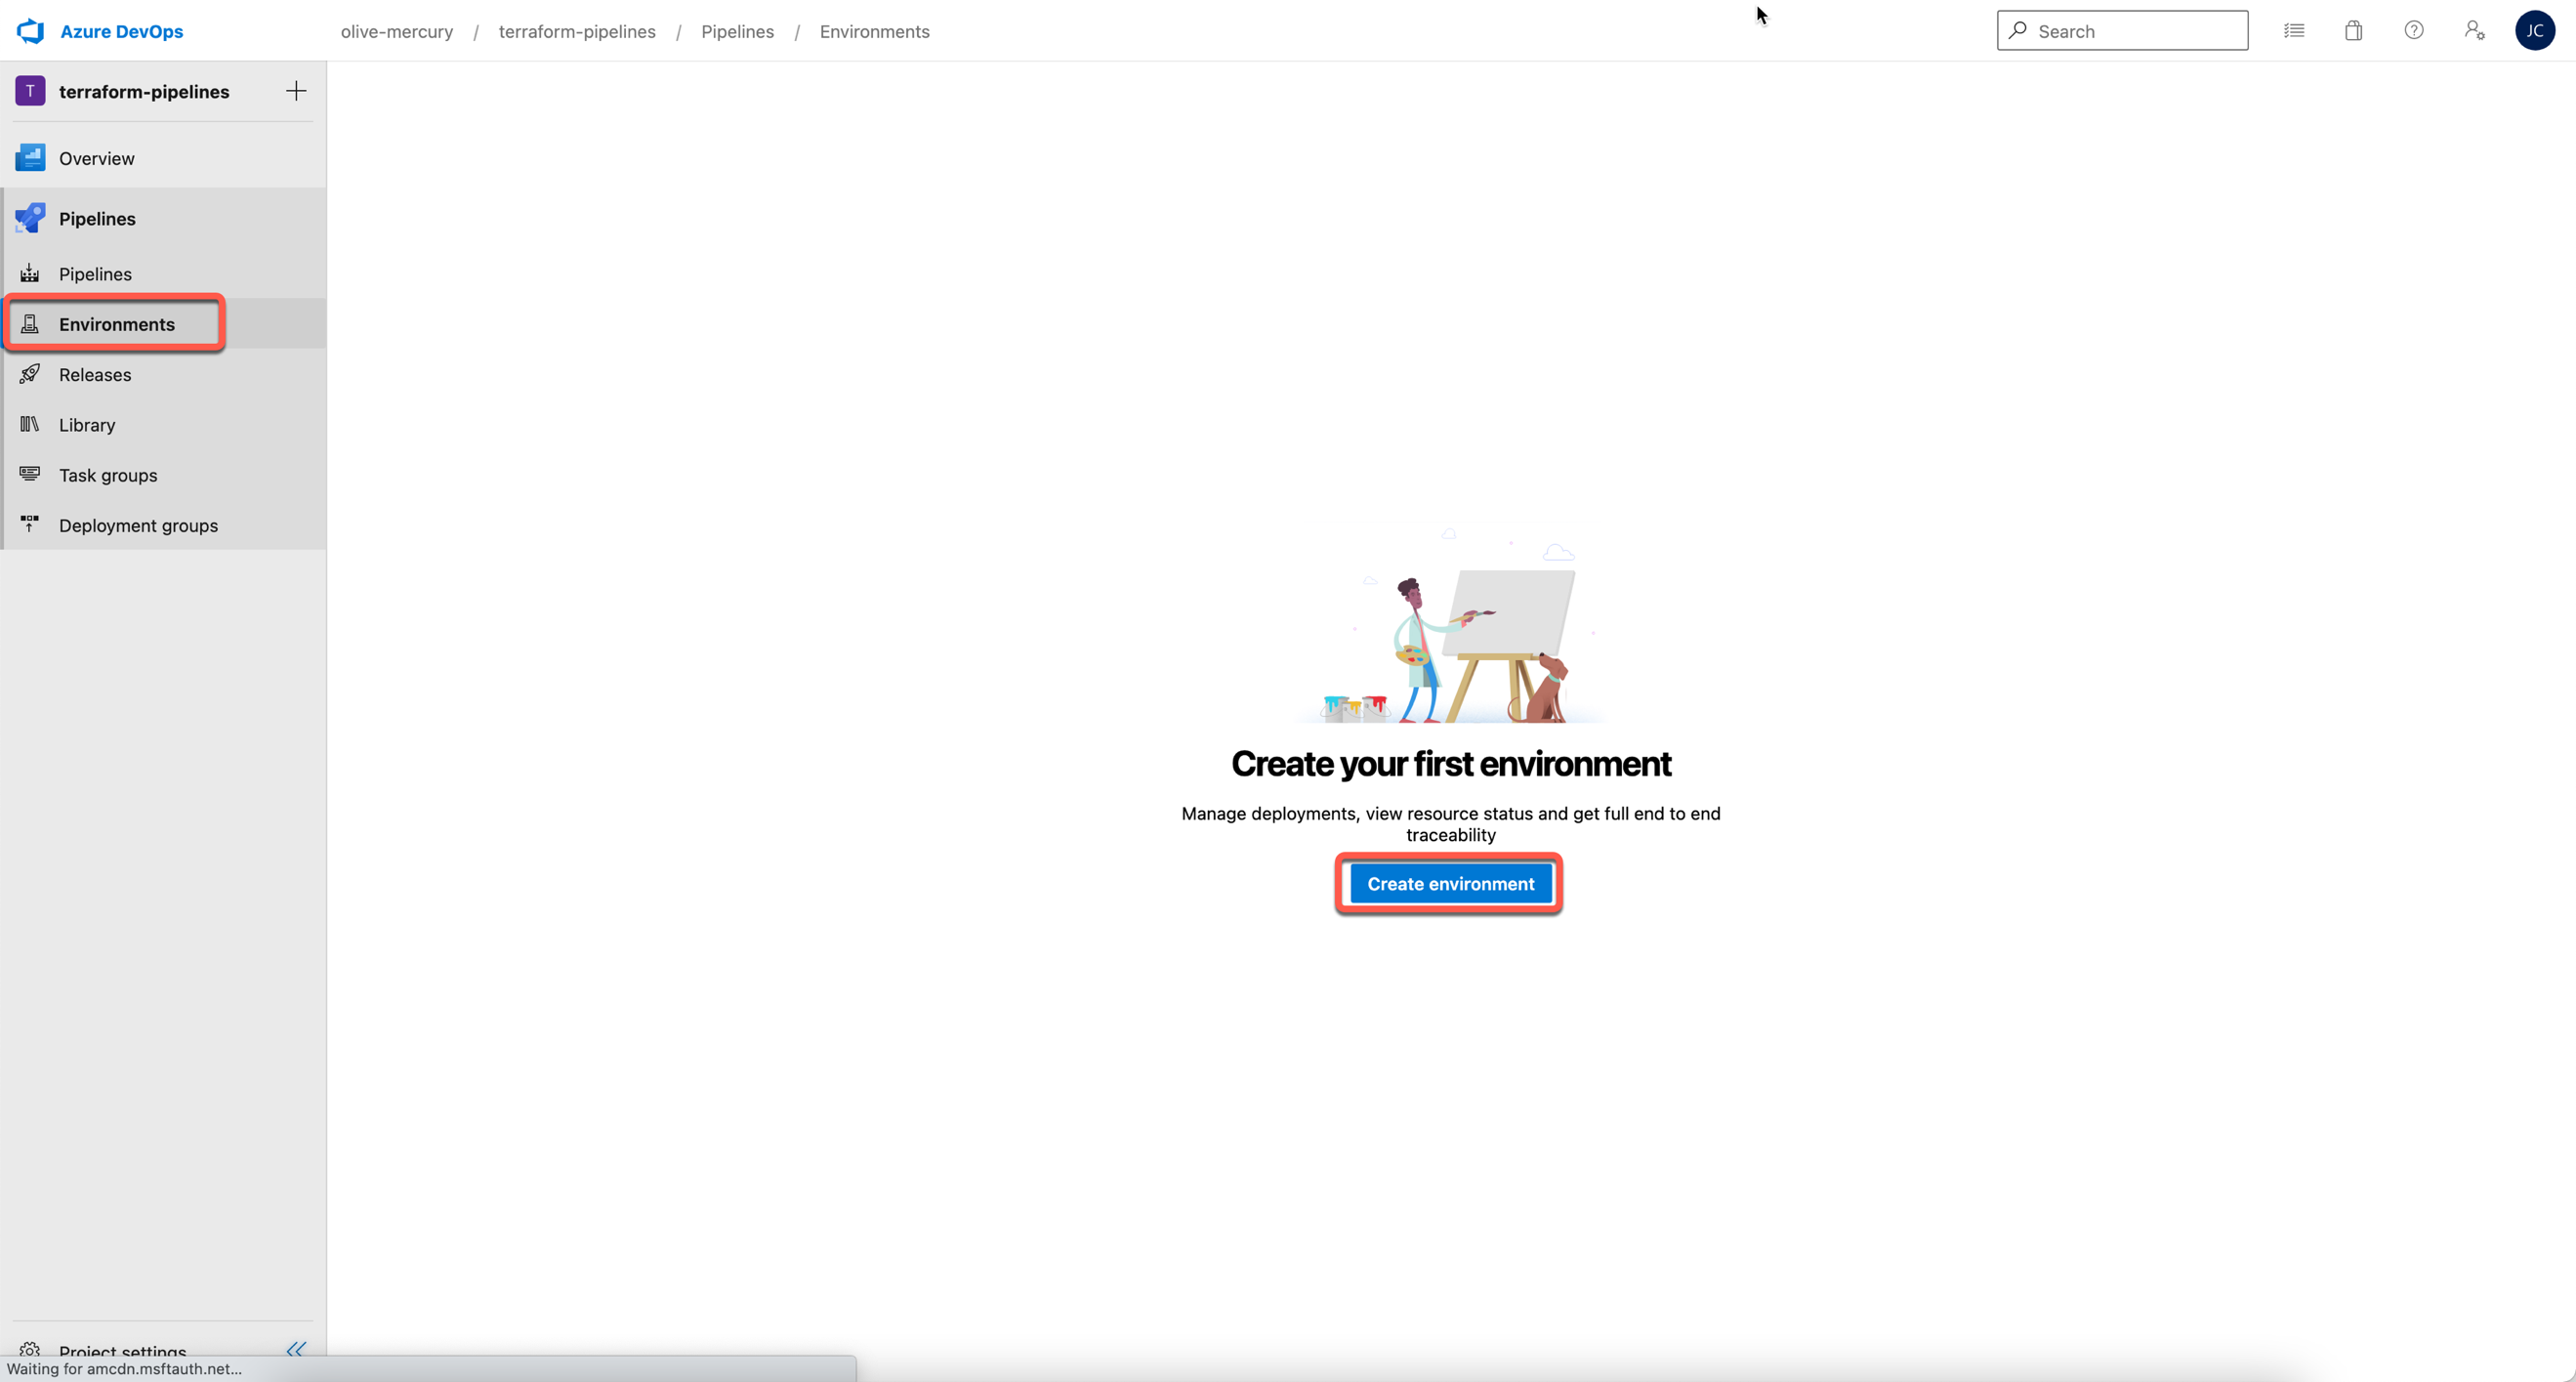
Next, type an environment name and click the Create button. You do not
need to add a resource. Choose None. I named my environment dev:

Next, use the top-right menu to select “Approvals and checks.”

Select “Approvals.” Then enter an appropriate user or group to supply approvals. Next, choose “Create.”
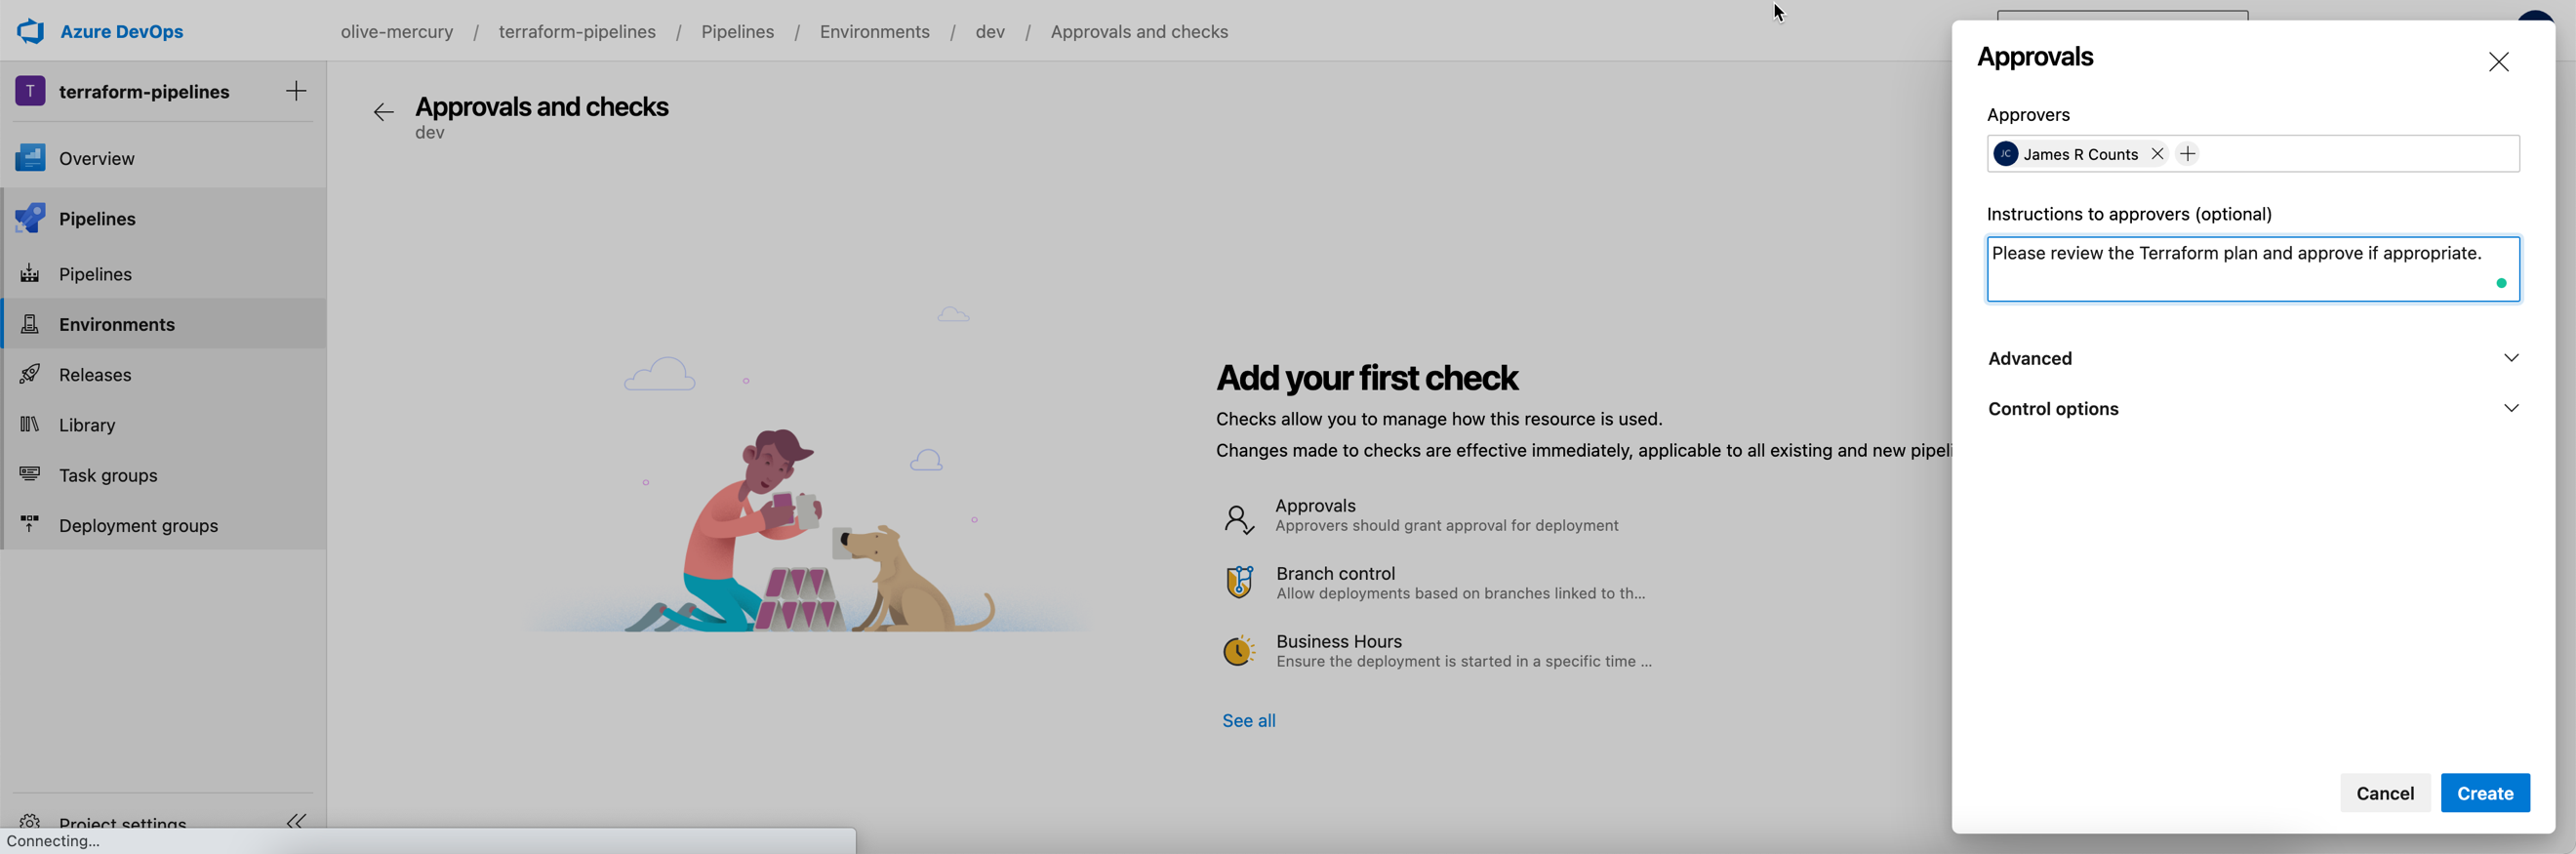
Azure DevOps displays the gate for you on success.
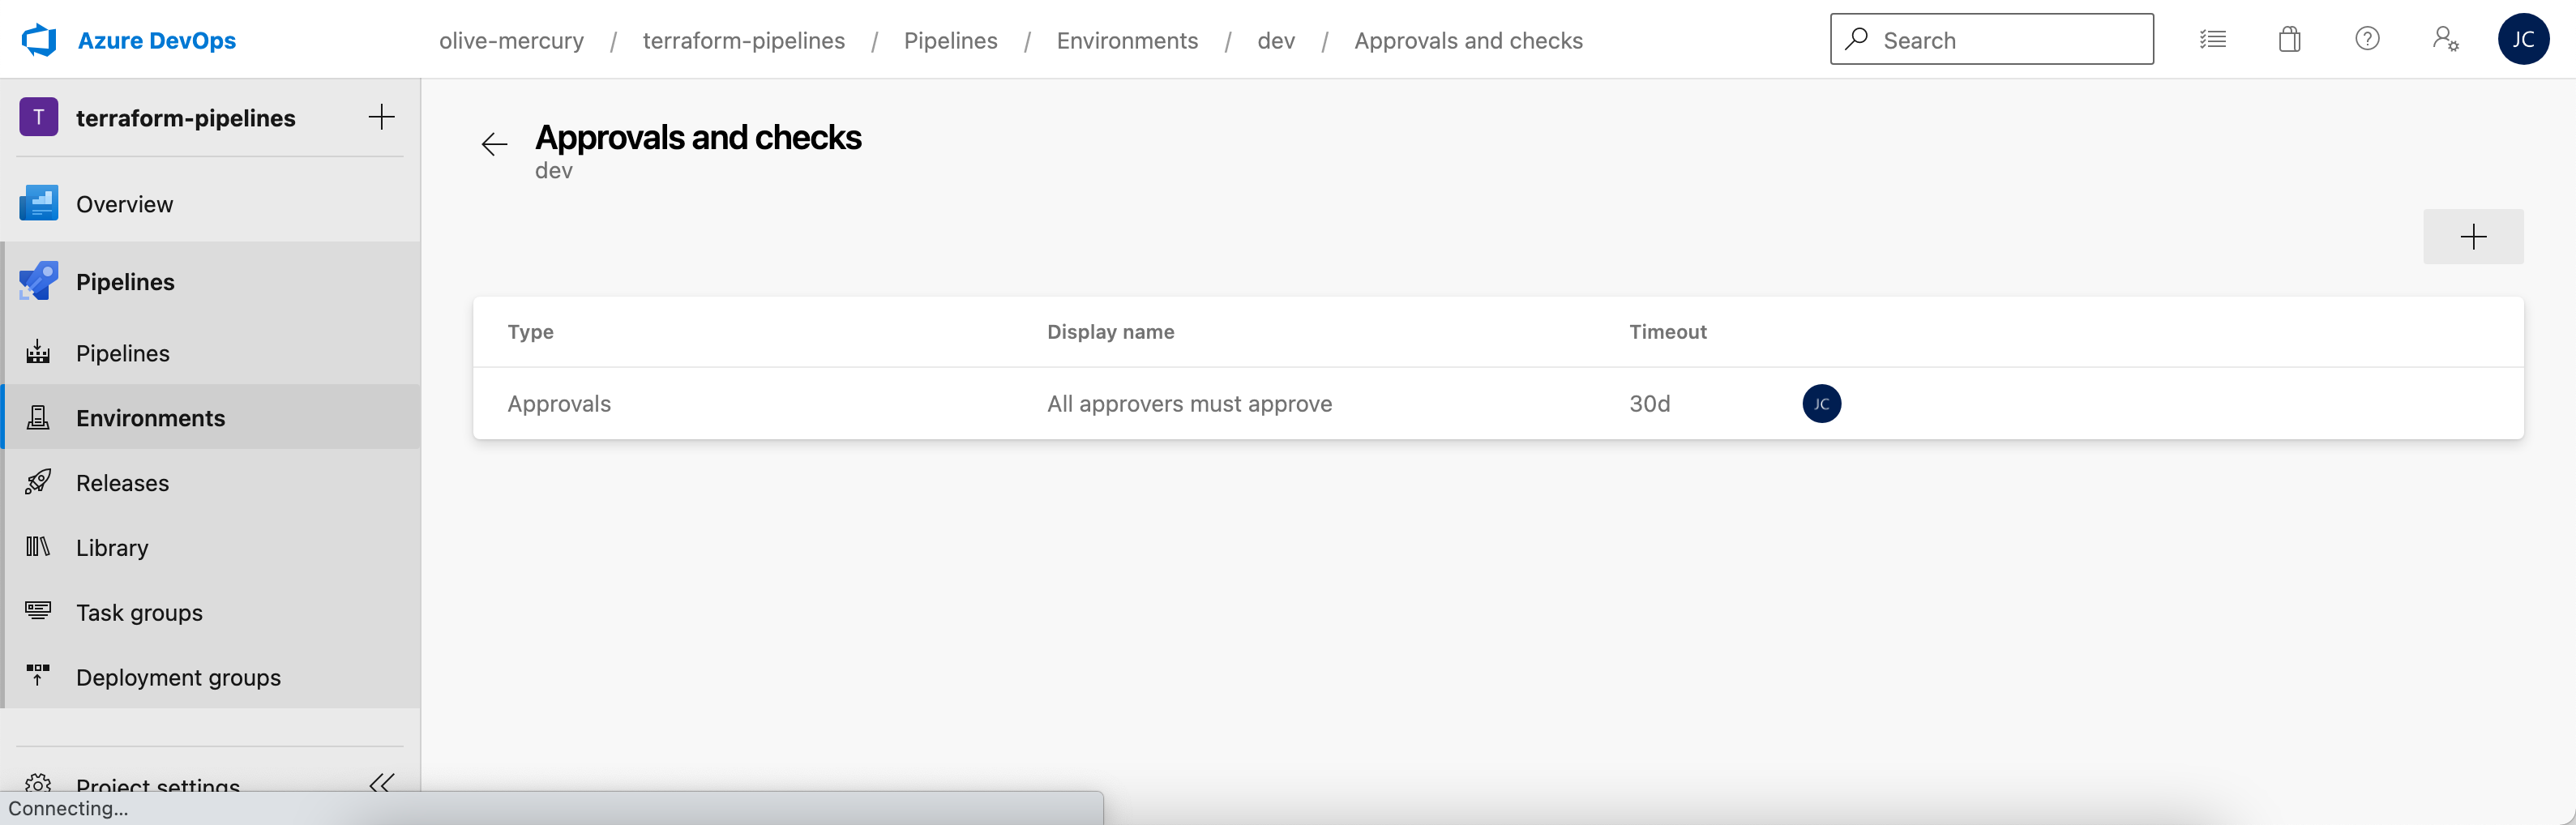
That’s it. This Azure DevOps environment is now ready for use with our Terraform deployment stage.
Create Infrastructure Deployment Stage
Our Terraform automation includes a build stage to produce a plan
artifact and an environment to facilitate review and approval. To make
changes to our infrastructure, we need a deployment stage. This stage
goes into our existing azure-pipelines.yml file after the build stage
definition (visit the complete file on GitHub for context).
infrastructure/azure-pipelines.yml:
- stage: deploy
  jobs:
    - deployment: terraform
      condition: and(succeeded(), ne(variables['Build.Reason'], 'PullRequest'))
      displayName: 'Change Infrastructure'
      environment: 'dev'
      strategy:
        runOnce:
          deploy:
            steps:
              - template: '../pipeline-templates/extract-plan.yml'
              - template: '../pipeline-templates/prepare-credentials.yml'
              - template: '../pipeline-templates/pin-terraform.yml'

              - task: Bash@3
                displayName: 'Terraform Apply'
                env:
                  ARM_CLIENT_ID: $(AZURE_CLIENT_ID)
                  ARM_CLIENT_SECRET: $(AZURE_CLIENT_SECRET)
                  ARM_SUBSCRIPTION_ID: $(AZURE_SUBSCRIPTION_ID)
                  ARM_TENANT_ID: $(AZURE_TENANT_ID)
                inputs:
                  targetType: 'inline'
                  workingDirectory: $(project_folder)
                  script: |
                    set -euo pipefail

                    terraform apply \
                      -input=false \
                      ${BUILD_BUILDNUMBER}.tfplan
Our deployment stage has these steps:
- Extract the Terraform configuration and plan
- Add Service Principal credentials to the environment
- Pin Terraform to a specific version
- Terraform apply
The environment: dev property connects this job to the dev
environment. All checks configured for that environment must pass
before any steps in this job can run.
Extract the Terraform configuration and plan
pipeline-templates/extract-plan.yml:
steps:
  - task: ExtractFiles@1
    displayName: 'Extract Plan Artifact'
    inputs:
      archiveFilePatterns: '$(Pipeline.Workspace)/plan/$(Build.BuildNumber).tgz'
      destinationFolder: '$(project_folder)/'
      cleanDestinationFolder: true
The deployment stage runs on a different agent than the build stage.
Azure DevOps automatically downloads the stored pipeline artifact to the
new agent. Since the Terraform build artifact is a gzipped tar archive,
this template uses the ExtractFiles task to unpack our stored
configuration and plan.
Add Service Principal credentials to the environment
Setting the pipeline secrets for Terraform to use is the same during deployment as it was during the build. The deploy pipeline uses the same pipeline template described above.
Pin Terraform to a specific version
Likewise, the version of Terraform downloaded to the build agent will not be available on the deploy agent. We take the same steps to download and verify our expected Terraform version. The deploy pipeline uses the same pipeline template described above.
Terraform apply
infrastructure/azure-pipelines.yml:
- task: Bash@3
  displayName: 'Terraform Apply'
  env:
    ARM_CLIENT_ID: $(AZURE_CLIENT_ID)
    ARM_CLIENT_SECRET: $(AZURE_CLIENT_SECRET)
    ARM_SUBSCRIPTION_ID: $(AZURE_SUBSCRIPTION_ID)
    ARM_TENANT_ID: $(AZURE_TENANT_ID)
  inputs:
    targetType: 'inline'
    workingDirectory: $(project_folder)
    script: |
      set -euo pipefail

      terraform apply \
        -input=false \
        ${BUILD_BUILDNUMBER}.tfplan
This task passes the service principal credentials to Terraform through the environment variable block using the same technique seen during the planning task. The script gives the name of the saved plan file to Terraform. Terraform assumes stored plans are pre-approved and immediately begins infrastructure changes.
Reviewing the Plan
The pipeline definition shows how to create a plan artifact, configure Azure DevOps to prompt an engineer for approval, and use the Terraform plan to change your infrastructure. Avoid providing deployment approval before reviewing the plan. Azure DevOps makes reviewing the plan simple. The plan is output as part of the build stage logs during the Terraform plan step. This log has the same format and the same information you would find when running Terraform interactively from a local machine.
Wrapping up
I always feel that it’s worth repeating that Terraform is a fantastic tool, but by itself, it is not capable of evaluating changes for safety. If you’re using Terraform in the real world, then your business depends on you to be the last and best safety mechanism. I hope you enjoyed learning how to build an Azure DevOps pipeline that supports the safe application of infrastructure changes using Terraform.